Arduino Kurse im Herbst 2023

This post is written in German because it addresses a German audience - the participants of Arduino classes held in German language.

Übersicht über Arduine Kurse an der VHS Tübingen in diesem Herbst

Auch diesen Herbst bieten wir wieder unsere beliebten Arduino-Kurse an - diesmal konnten wir die Kursgebühren reduzieren, da wir anbieten mit Leihhardware statt mit Kaufhardware zu arbeiten - meldet Euch schnell an, die Teilnehmerzahl ist begrenzt:

232-55100 Programmieren lernen mit Arduino - Schnupperkurs

  • 2 * 3 Stunden am Samstag 14.10. und 21.10.2023 von 14.00-17.00 Uhr
  • kostenlos

232-55101 Programmieren lernen mit Arduino Sensor Kit - Einstiegskurs

  • 2 * 3 Stunden am Samstag 11.11. und 18.11.2023 von 14.00-17.00 Uhr
  • 25,00€ - Kurspreis bei Verwendung von Leihhardware (Hardware kann für zusätzlich 40€ im Kurs gekauft werden)

232-55102 Grundlagen der Arduino Internet of things (IoT) Cloud

  • 2 * 3 Stunden am Samstag 2.12. und 9.12.2023 von 14.00-17.00 Uhr
  • 69,00€ - Kurspreis bei Verwendung von Leihhardware (Hardware kann für zusätzlich 40€ im Kurs gekauft werden)

Picture created by Midjourney AI https://www.midjourney.com/home/

Warum Arduino und was wollen wir damit erreichen?

Arduino ist die ideale Einstiegsplattform in die Welt der Maker und des Programmierens:

Arduino verknüpft einfache Programme mit der physikalischen Welt, denn man programmiert kleine Computer, sogenannte Microcontroller, die mit der Welt interagieren und z.B. Sensordaten messen oder Leds und Motoren steuern.

Man kann also den Effekt seines Programmes unmittelbar sehen oder hören und kann innerhalb kurzer Zeit Maker-Projekte wie Wetterstation, Beleuchtungssteuerung, Messen und Loggen von Strom, Wasser, einfache Robotikaufgaben etc. erlernen und selbst realisieren.

Es gibt zwar mittlerweile auch im Niedrigpreis-Segment andere beliebte Plattformen wie Raspberry Pi oder kompatible Controller (wie ESP32), aber die Arduino Plattform ist immer noch die am besten dokumentierte Plattform mit der besten Unterstützung durch einen grossen Kreis von Anwendern - so bekommt man jederzeit Hilfe zur Selbsthilfe bei den eigenen Projekten.

Die Konzepte, die wir in unseren Kursen vermitteln können dann aber auch auf andere Plattformen und Programmiersprachen übertragen und angewandt werden.

Wenn Ihr Euch vorab etwas in die Arduino-Welt einlesen wollt - hier sind links zu der englischen Arduino-Webseite und dem deutschsprachigen Funduino

Arduino Doc
Arduino Webseite

Funduino

Kursbeschreibungen

Die Kursbeschreibungen im Detail findet ihr auf der VHS-Seite - siehe Links oben.
Hier nur noch etwas mehr Details über die jeweilige Zielgruppe und Kursziele:

Schnupperkurs

232-55100 Programmieren lernen mit Arduino - Schnupperkurs

Diesen Kurs bieten wir kostenlos an, denn hier benötigen wir noch keine Hardware.
Alle Programme werden auf einem Simulator (auf dem PC) geschrieben.

Dieser Kurs ist für absolute Anfänger geeignet, die ausser der Benutzung eines PCs keine Vorkenntnisse mitbringen.
Wir verwenden in diesem Kurs den Arduino Simulator Autodesk Tinkercad

Kursziel ist es, ein Grundverständnis für die Funktionsweise eines Computers am Beispiel des Arduino Microcontrollers zu entwickeln und erste einfache, eigene Programme zu entwickeln, die z.B. Messwerte von Sensoren erfassen oder LEDs zum blinken bringen.

Die Programme werden zunächst “visuell programmiert” - erst im 2.Teil verwenden wir dann die Arduino Programmiersprache C.

Wir empfehlen Anfängern diesen Kurs vor den anderen Kursen zu belegen.

Geeignet ist der Kurs auch wenn ihr euch nicht sicher seid, ob das das richtige für euch ist und ihr erstmal reinschnuppern wollt, bevor ihr 100€ für die Hardware in den anderen Kursen investiert.

Sensorkit

232-55101 Programmieren lernen mit Arduino Sensor Kit - Einstiegskurs

In diesem Kurs verwenden wir echte Hardware - einen Arduino Uno mit einem Sensorkit - und erstellen Programme auf dem PC, die wir dann auf dem Arduino zur Ausführung bringen.

Diese Programme lesen Sensorwerte (Temperatur, Luftfeuchtigkeit, Beschleunigung) des Sensorkits und kontrollieren Aktoren wie Buzzer oder LED.

Die Programme werden in der Arduino Programmiersprache C erstellt.

Auch dieser Kurs richtet sich an Anfänger in der Programmierung und wir werden alle Konzepte über Microcontroller und Programmieren von Grund auf erklären.

Arduino IoT Cloud

232-55102 Grundlagen der Arduino Internet of things (IoT) Cloud

Die Arduino IoT Cloud ermöglicht es, Arduinos und Arduino-kompatible Geräte mit dem Internet zu verbinden um dann z.B. Messwerte auf einer Smartphone-App anzuzeigen und zu visualisieren oder Geräte, die vom Arduino gesteuert werden, über eine App aus der Ferne zu steuern.

Arduino Iot Cloud Webseite auf Deutsch

In diesem Kurs setzen wir Vorkenntnisse mit Arduino-Programmierung voraus und fokussieren auf die Anbindung an die IoT Cloud.
Das heisst diese Kenntnisse solltet ihr entweder mitbringen oder davor einen der beiden anderen Kurse besuchen.

Wir werden also Arduino Grundlagen aus den Anfängerkursen nur kurz wiederholen und starten dann direkt mit einer
Einführung in die Arduino IoT Cloud (Registrieren von Endgeräten, Things, Devices, Variablen, Dashboard).

Dann erfassen wir Sensordaten mit einem Arduino Sketch (Programm)
und speichern diese Sensordaten in der Arduino IoT Cloud.
Wir erstellen dann eine App die den Sensor-Datenverlauf auf dem Smartphone anzeigen.
Ausserdem werden wir den Sensor-Datenverlauf in Google Sheets speichern und visualisieren.

LoRaWAN ist eine Übertragungstechnik, die es erlaubt, Geräte von überall kostenlos mit der Cloud zu verbinden - ohne dass ein WLAN in der Nähe ist.

Auch diese Technik lernen wir kennen und erfahren, für welche Projekte LoRaWAN geeignet ist und wo besser eine WLAN-Anbindung benutzt wird.

Eindrücke aus früheren Kursen

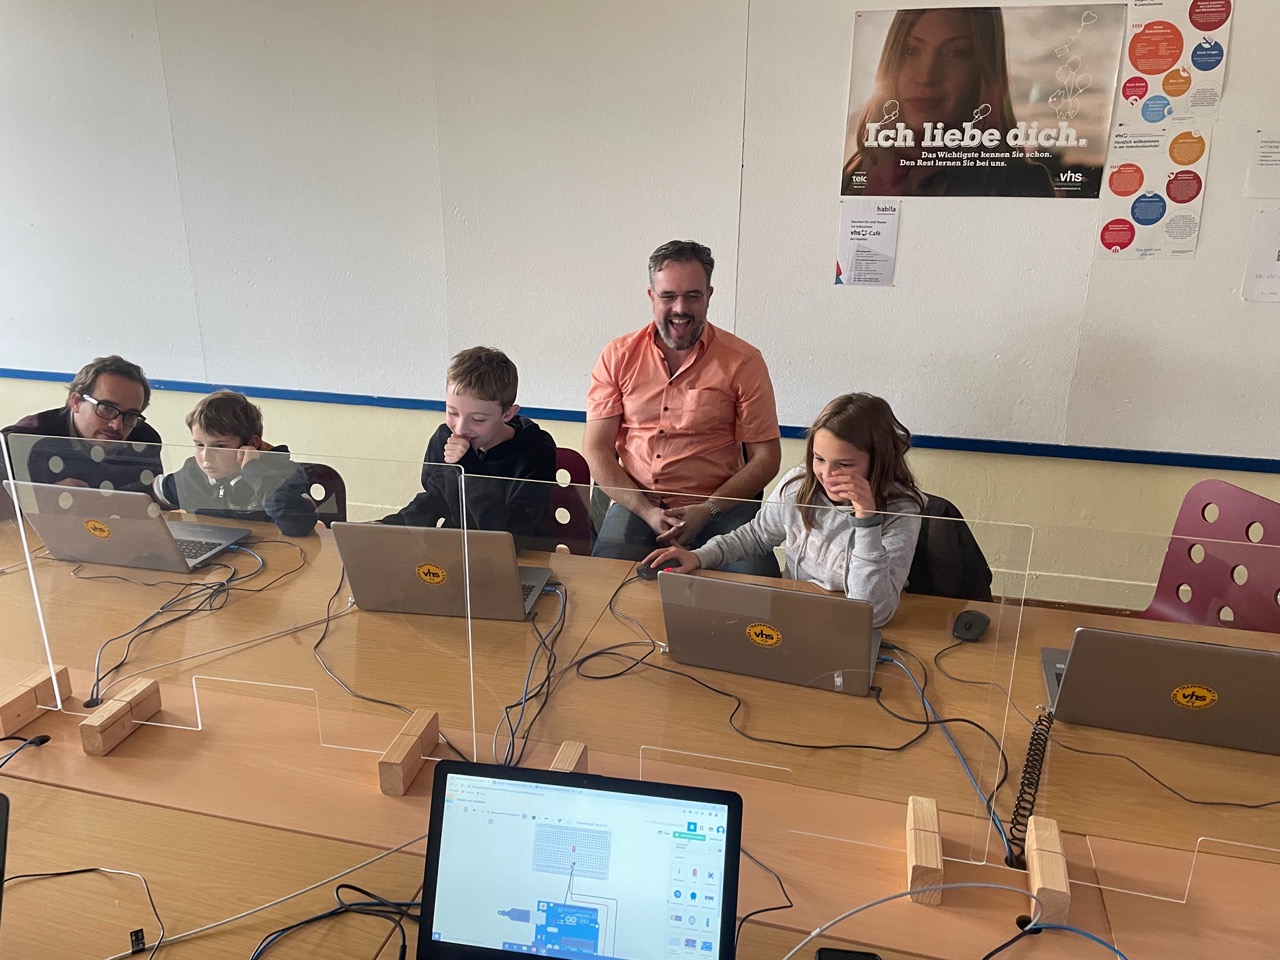
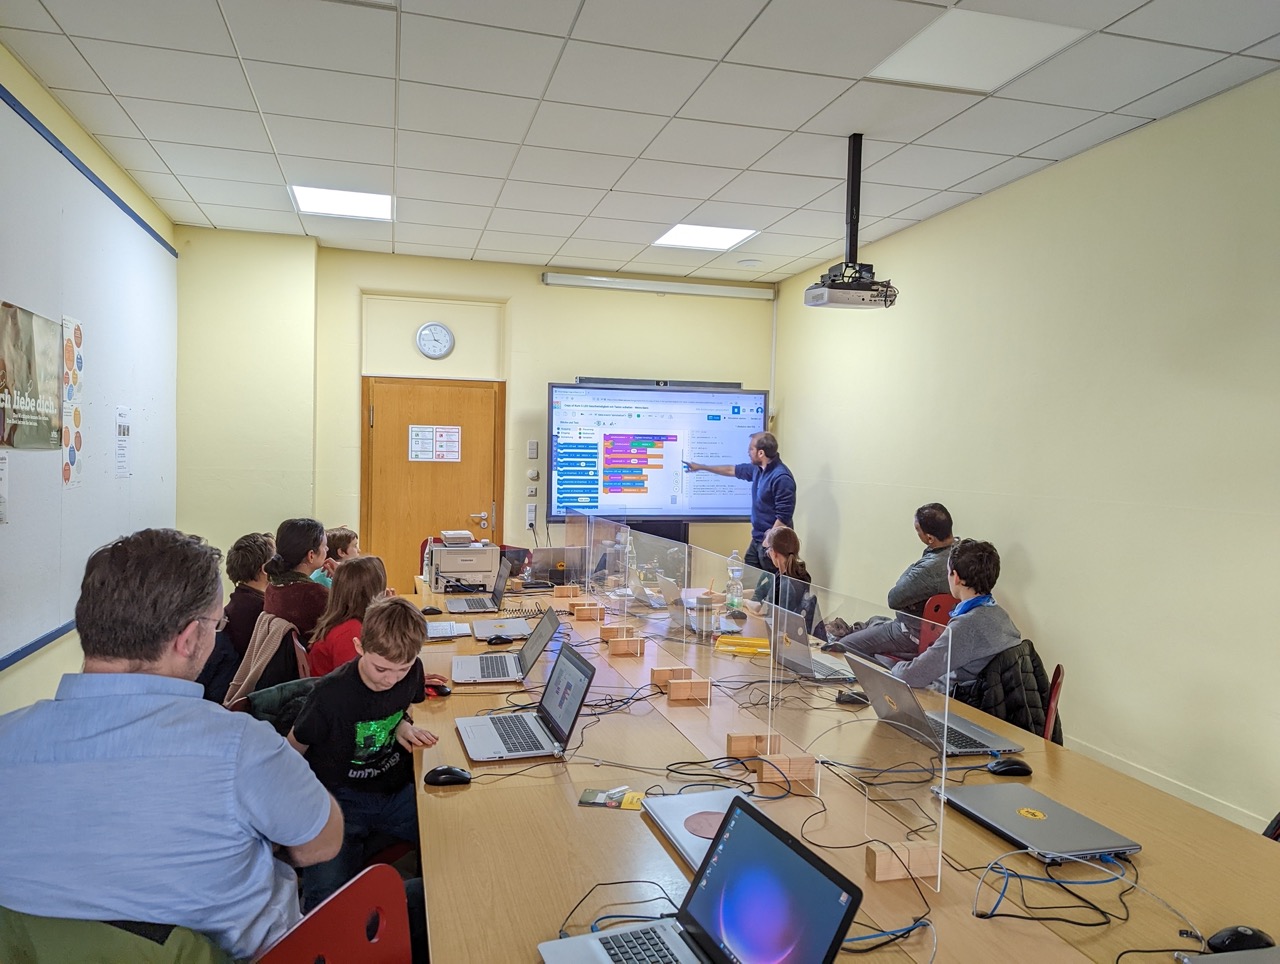
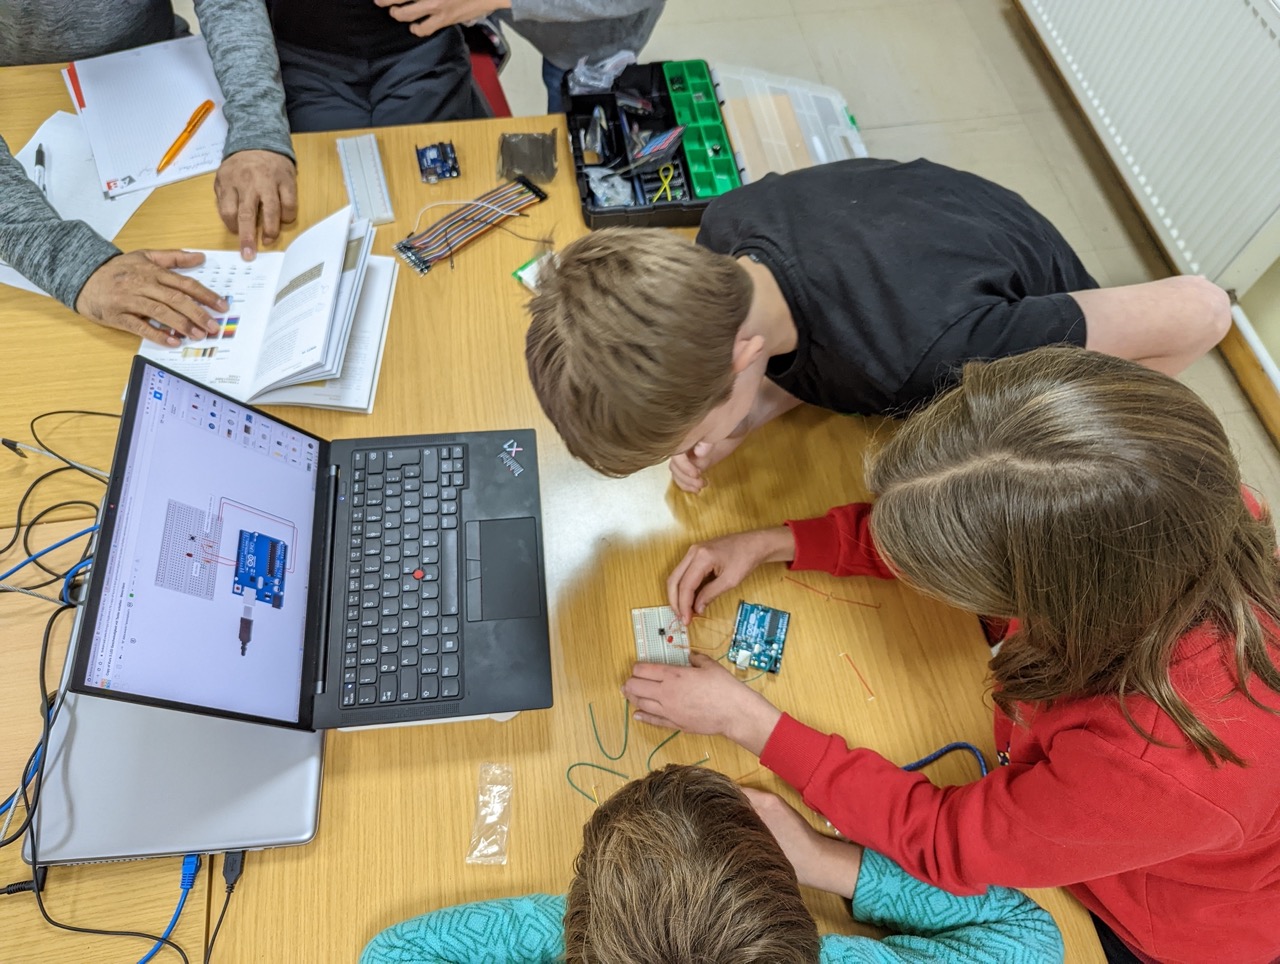
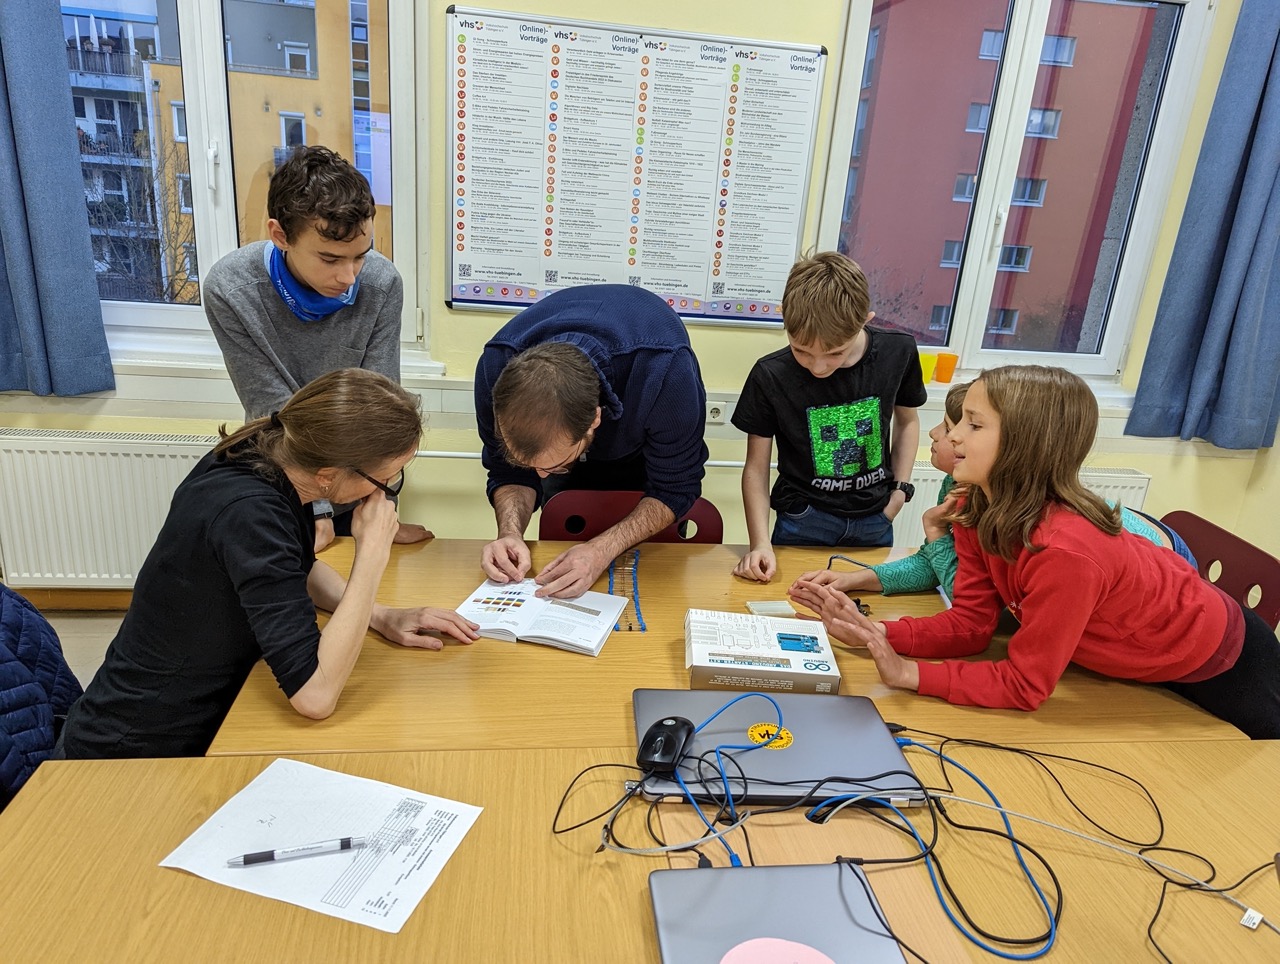
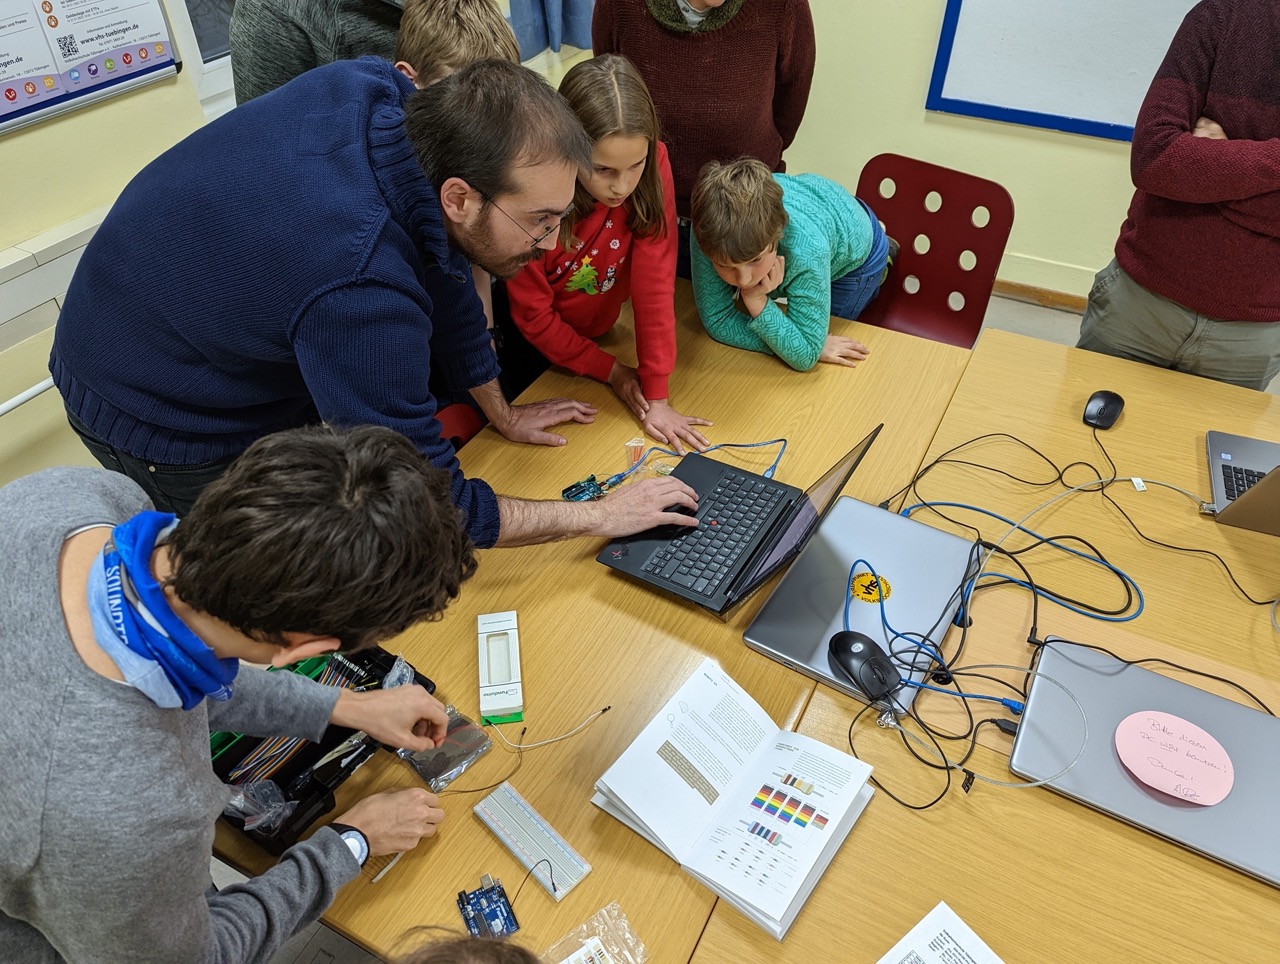
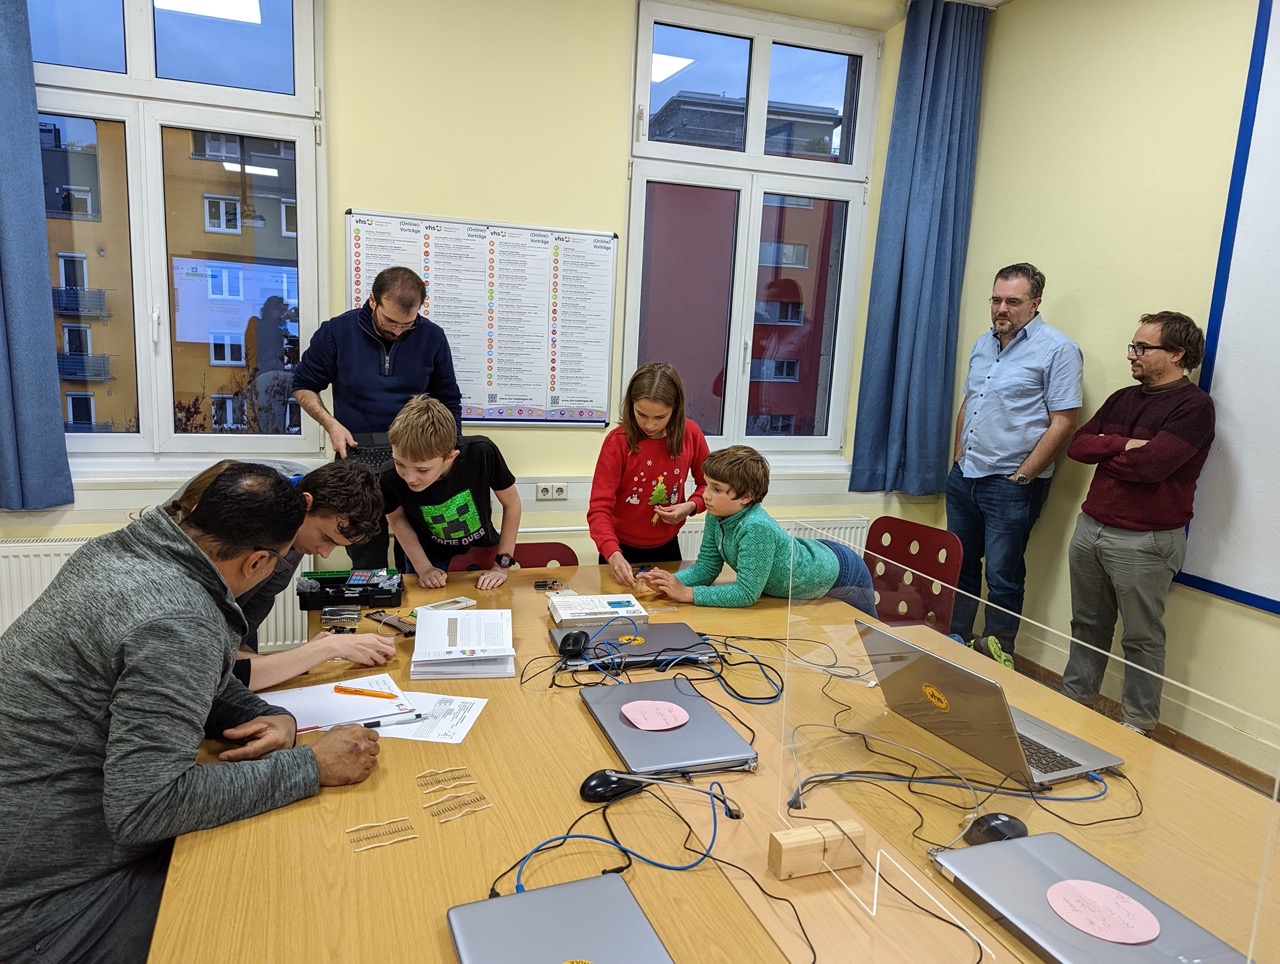
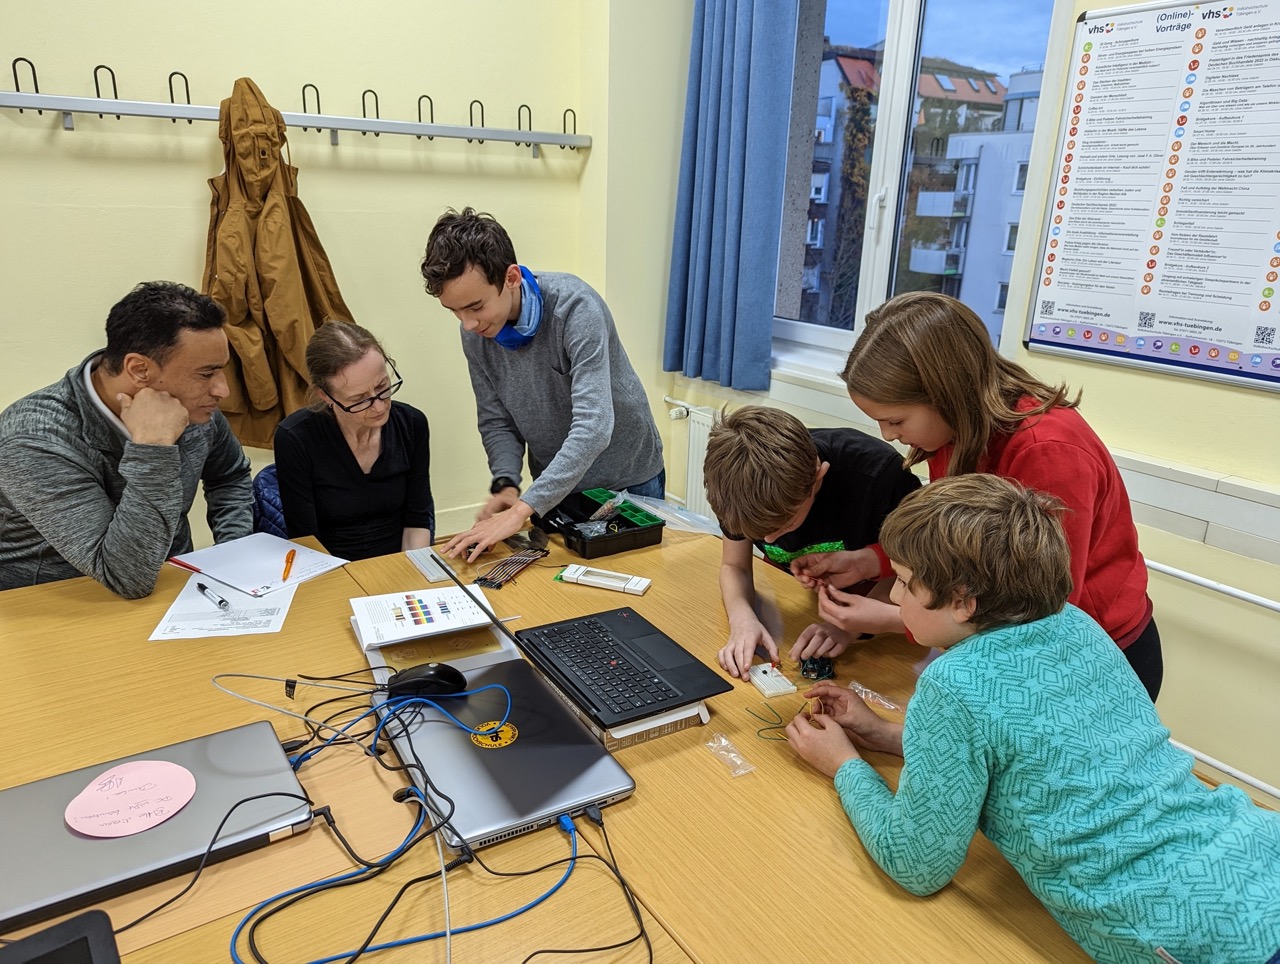
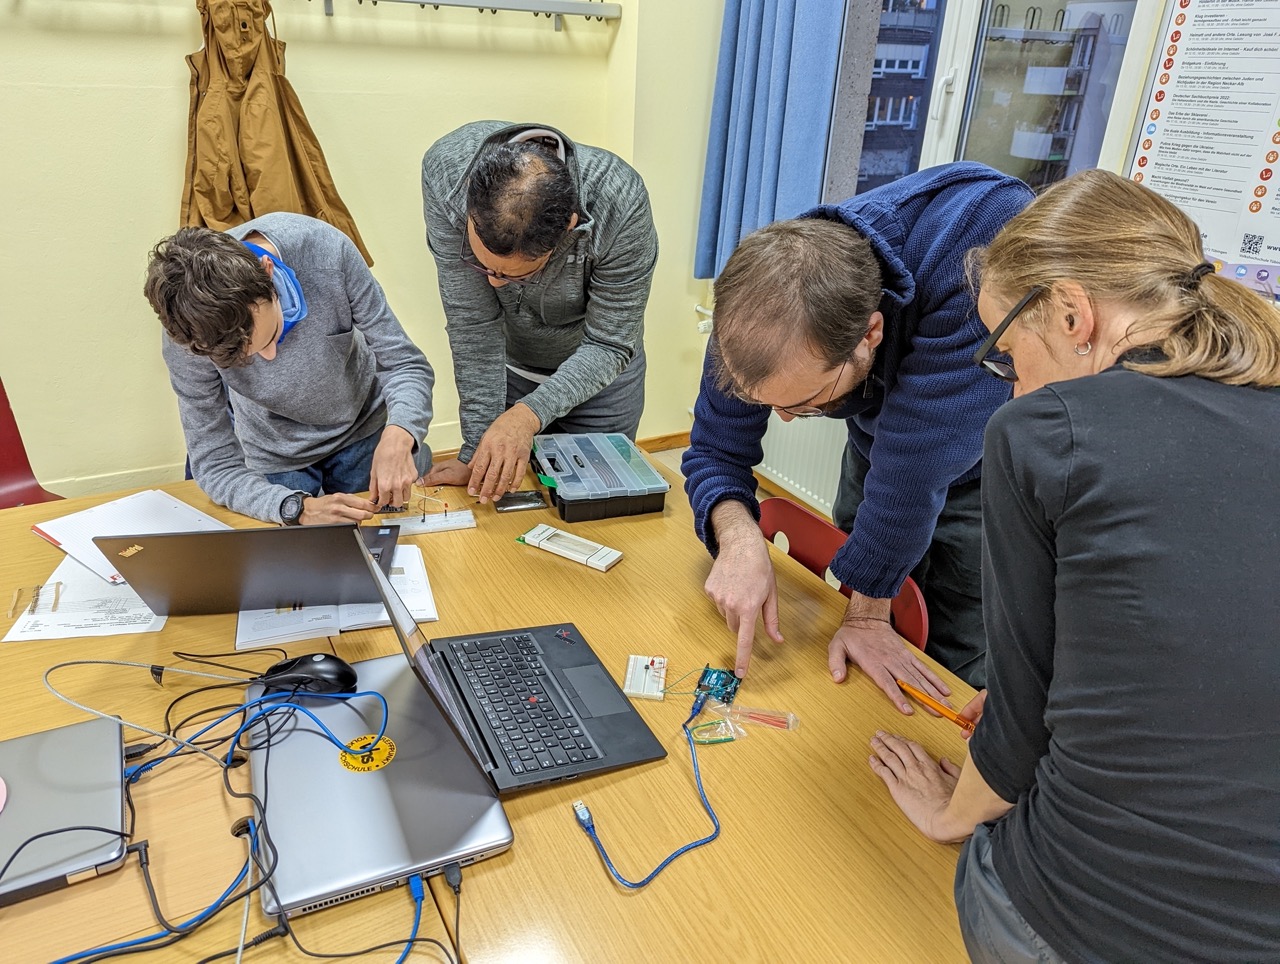
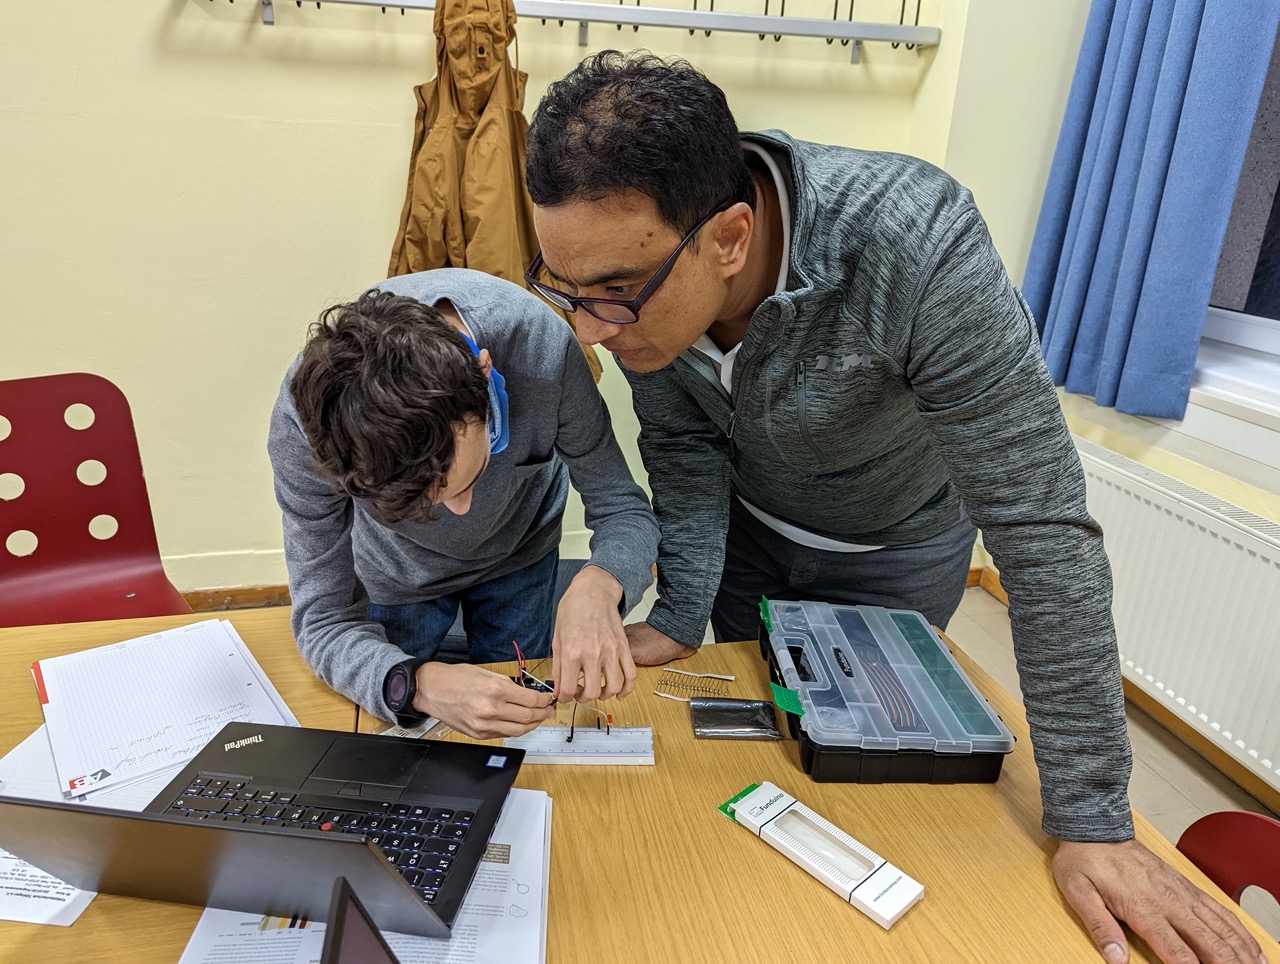
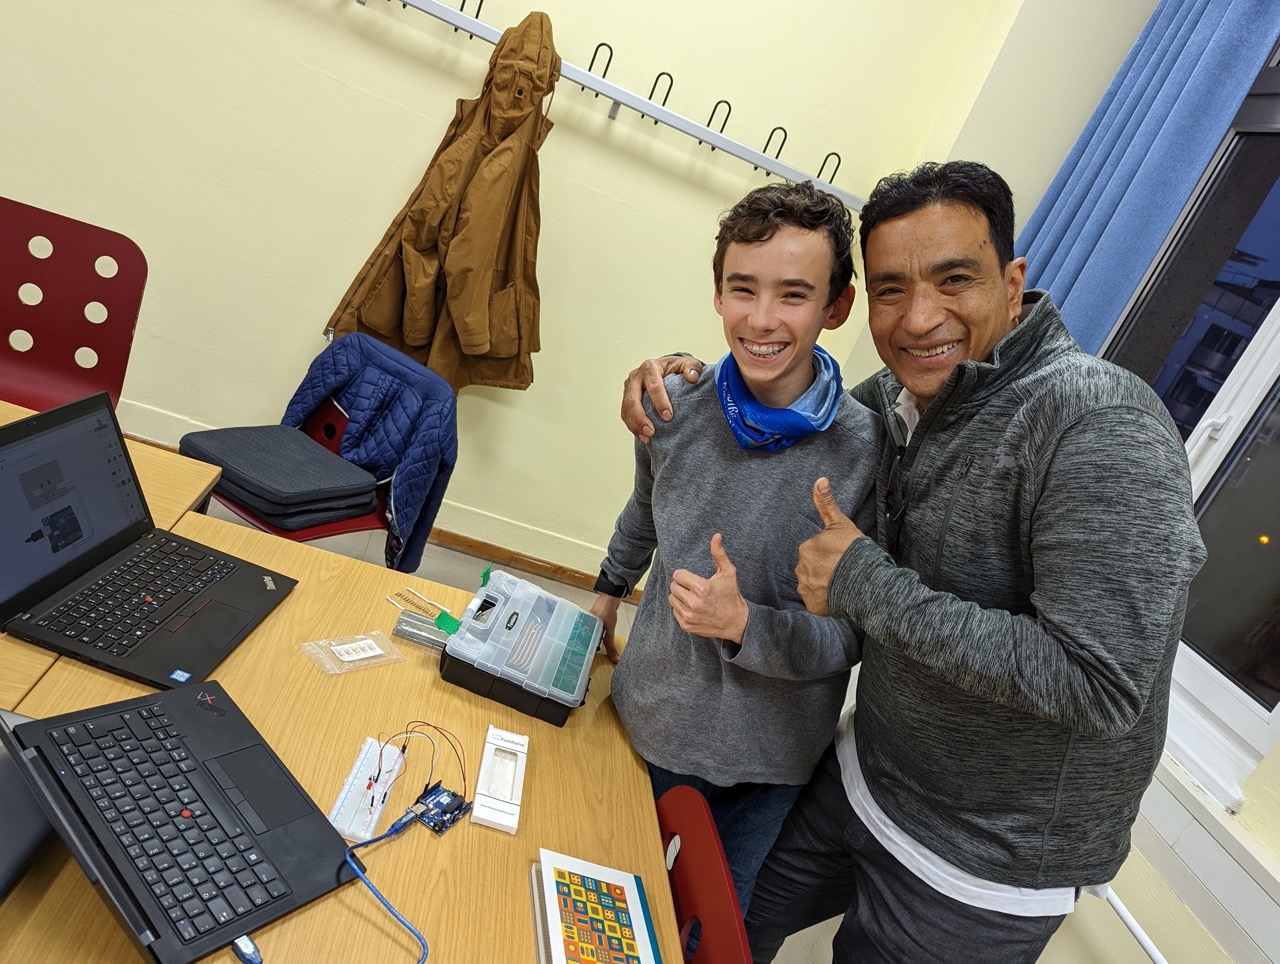
Hier noch einige weitere Bilder von früheren Kursen - wir bieten unsere Kurse explizit auch für Kinder und Jugendliche ab 14 Jahren an - unter 14 Jahren bitten wir um Begleitung eines Erwachsenen.

Schnupperkurs Bild 1

Schnupperkurs Bild 2

Schnupperkurs Bild 3

Schnupperkurs Bild 4

Schnupperkurs Bild 5

Schnupperkurs Bild 6

Schnupperkurs Bild 7

Schnupperkurs Bild 8

Schnupperkurs Bild 9

Schnupperkurs Bild 10

Using Bing chat (Skype) as your personal language trainer

TLDR

You are learning a new language, such as Spanish, and have progressed beyond the level of popular tools such as “Babbel” or “Duolingo”.
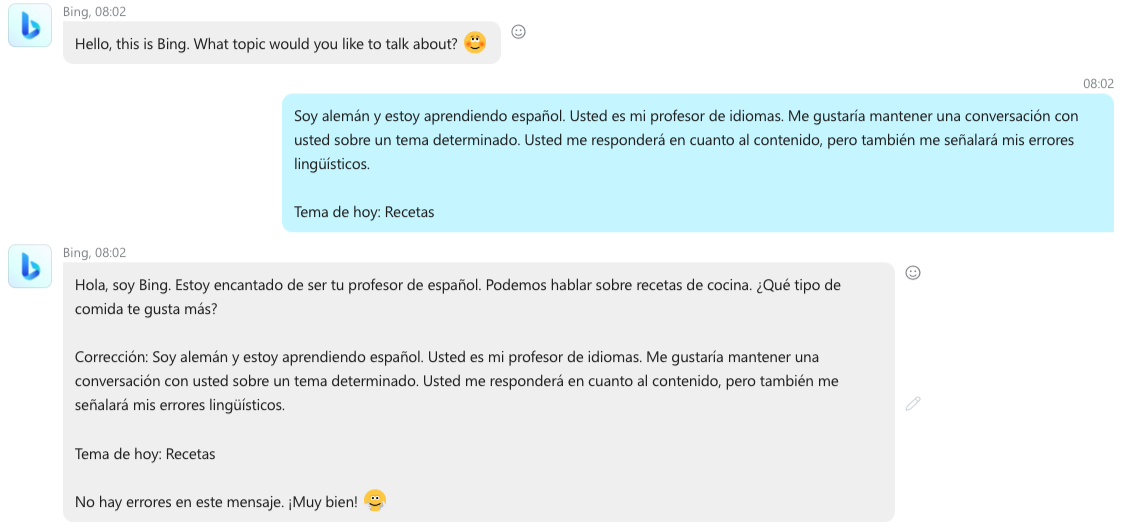
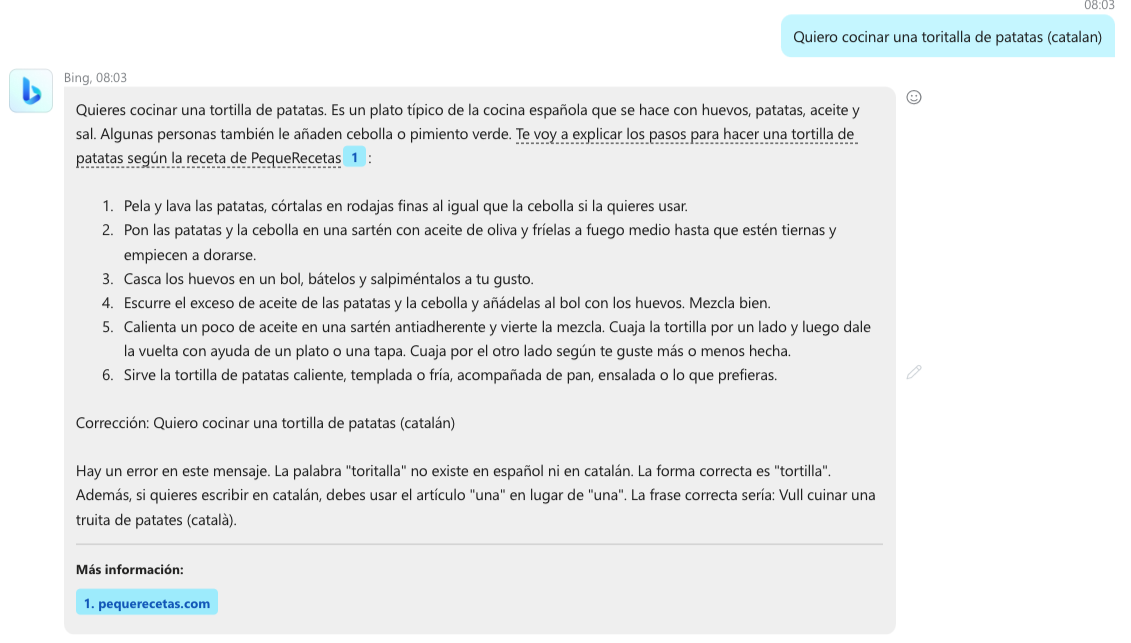
You can now use Transformer LLMs as your personal language trainer, as shown below using the example of “Bing chat”, now integrated into Skype as a free technical preview.

At the time of writing you can use it to learn English, Spanish, French, German, Italian, Portuguese, Chinese and Japanese.

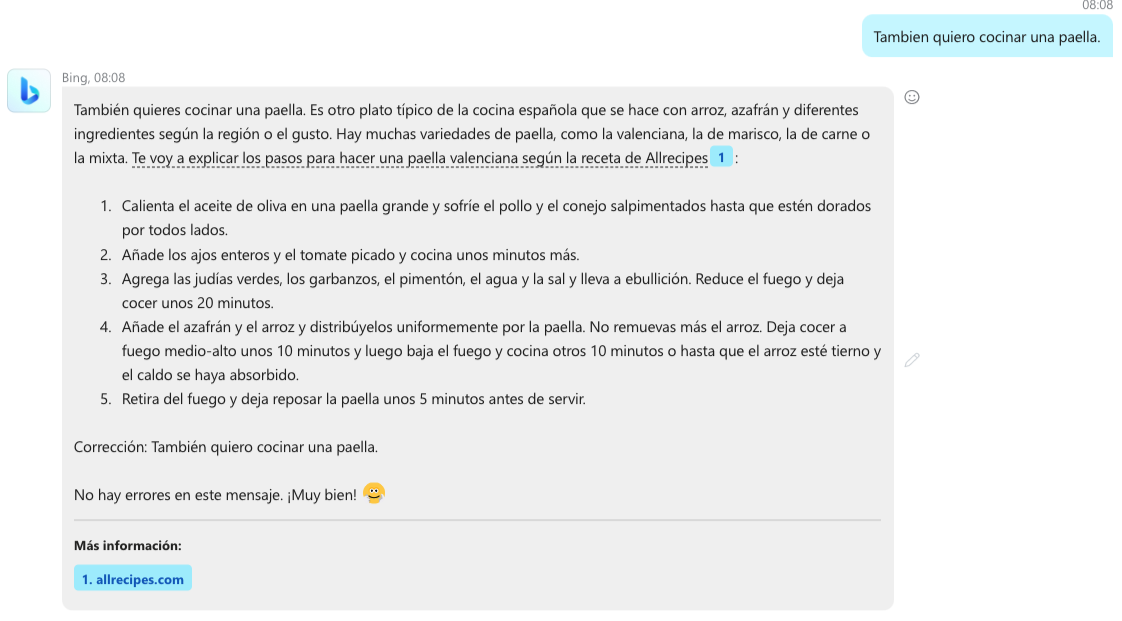
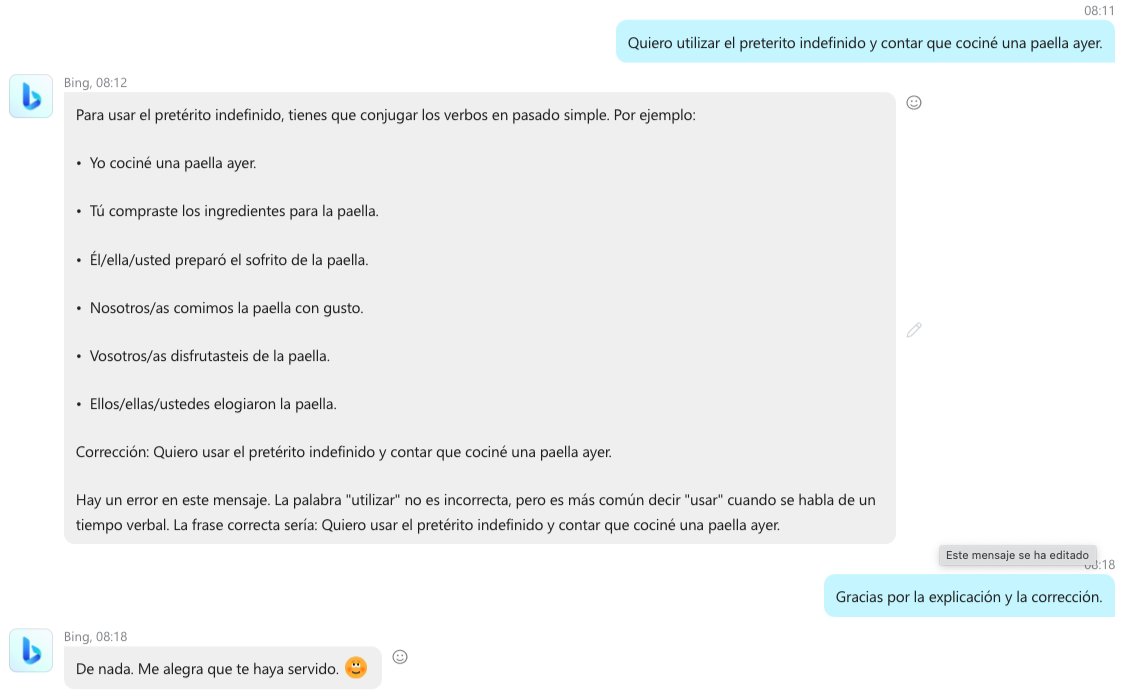
Example conversation of a student learning Spanish

bing chat example bing chat example bing chat example bing chat example bing chat example

What do you need to use this feature

  • Download the latest version of Skype for your platform
  • Sign in to your Skype account (free) or register a new one
  • There will be a chat called “Bing - your AI copilot”.

What prompt do you need to use to start the conversation or to change the topic?

Whenever you want to start a new conversation or want to change the topic, send newtopic as a one-word message to Bing Chat.

bing chat newtopic

You will then need to prompt the model (give it a context in which to respond), for example, using the following prompt, translated into the target language
you intend to learn:

1
2
3
4
5
I am English and I am learning Spanish. You are my language teacher. 
I would like to have a conversation with you on a certain topic.
You will answer me in terms of content, but you will also point out my linguistic mistakes.

Today's topic: <replace with the topic you want to discuss>

A concrete example of learning Spanish and talking about cooking recipes could be

1
2
3
4
5
6
Soy alemán y estoy aprendiendo español. 
Usted es mi profesor de idiomas.
Me gustaría mantener una conversación con usted sobre un tema determinado.
Usted me responderá en cuanto al contenido, pero también me señalará mis errores lingüísticos.

Tema de hoy: Recetas

To easily translate the prompt into your target language you can use Deepl or Google translate.

Affiliations

I am in no way related to Skype, Microsoft, Babbel, Duolingo, Deepl or Google and do not get any payment from them.

However if you like this blog post you can pay me a coffee https://www.paypal.com/donate/?hosted_button_id=JBFJMV35LX5AY

Pythonista script to create satellite map of photos in iOS photo library

TLDR

If you want to create a satellite map showing where the photos in your photo library have been taken for a given date range this is for you.
Pythonista is an app to develop in Python on an iPad.
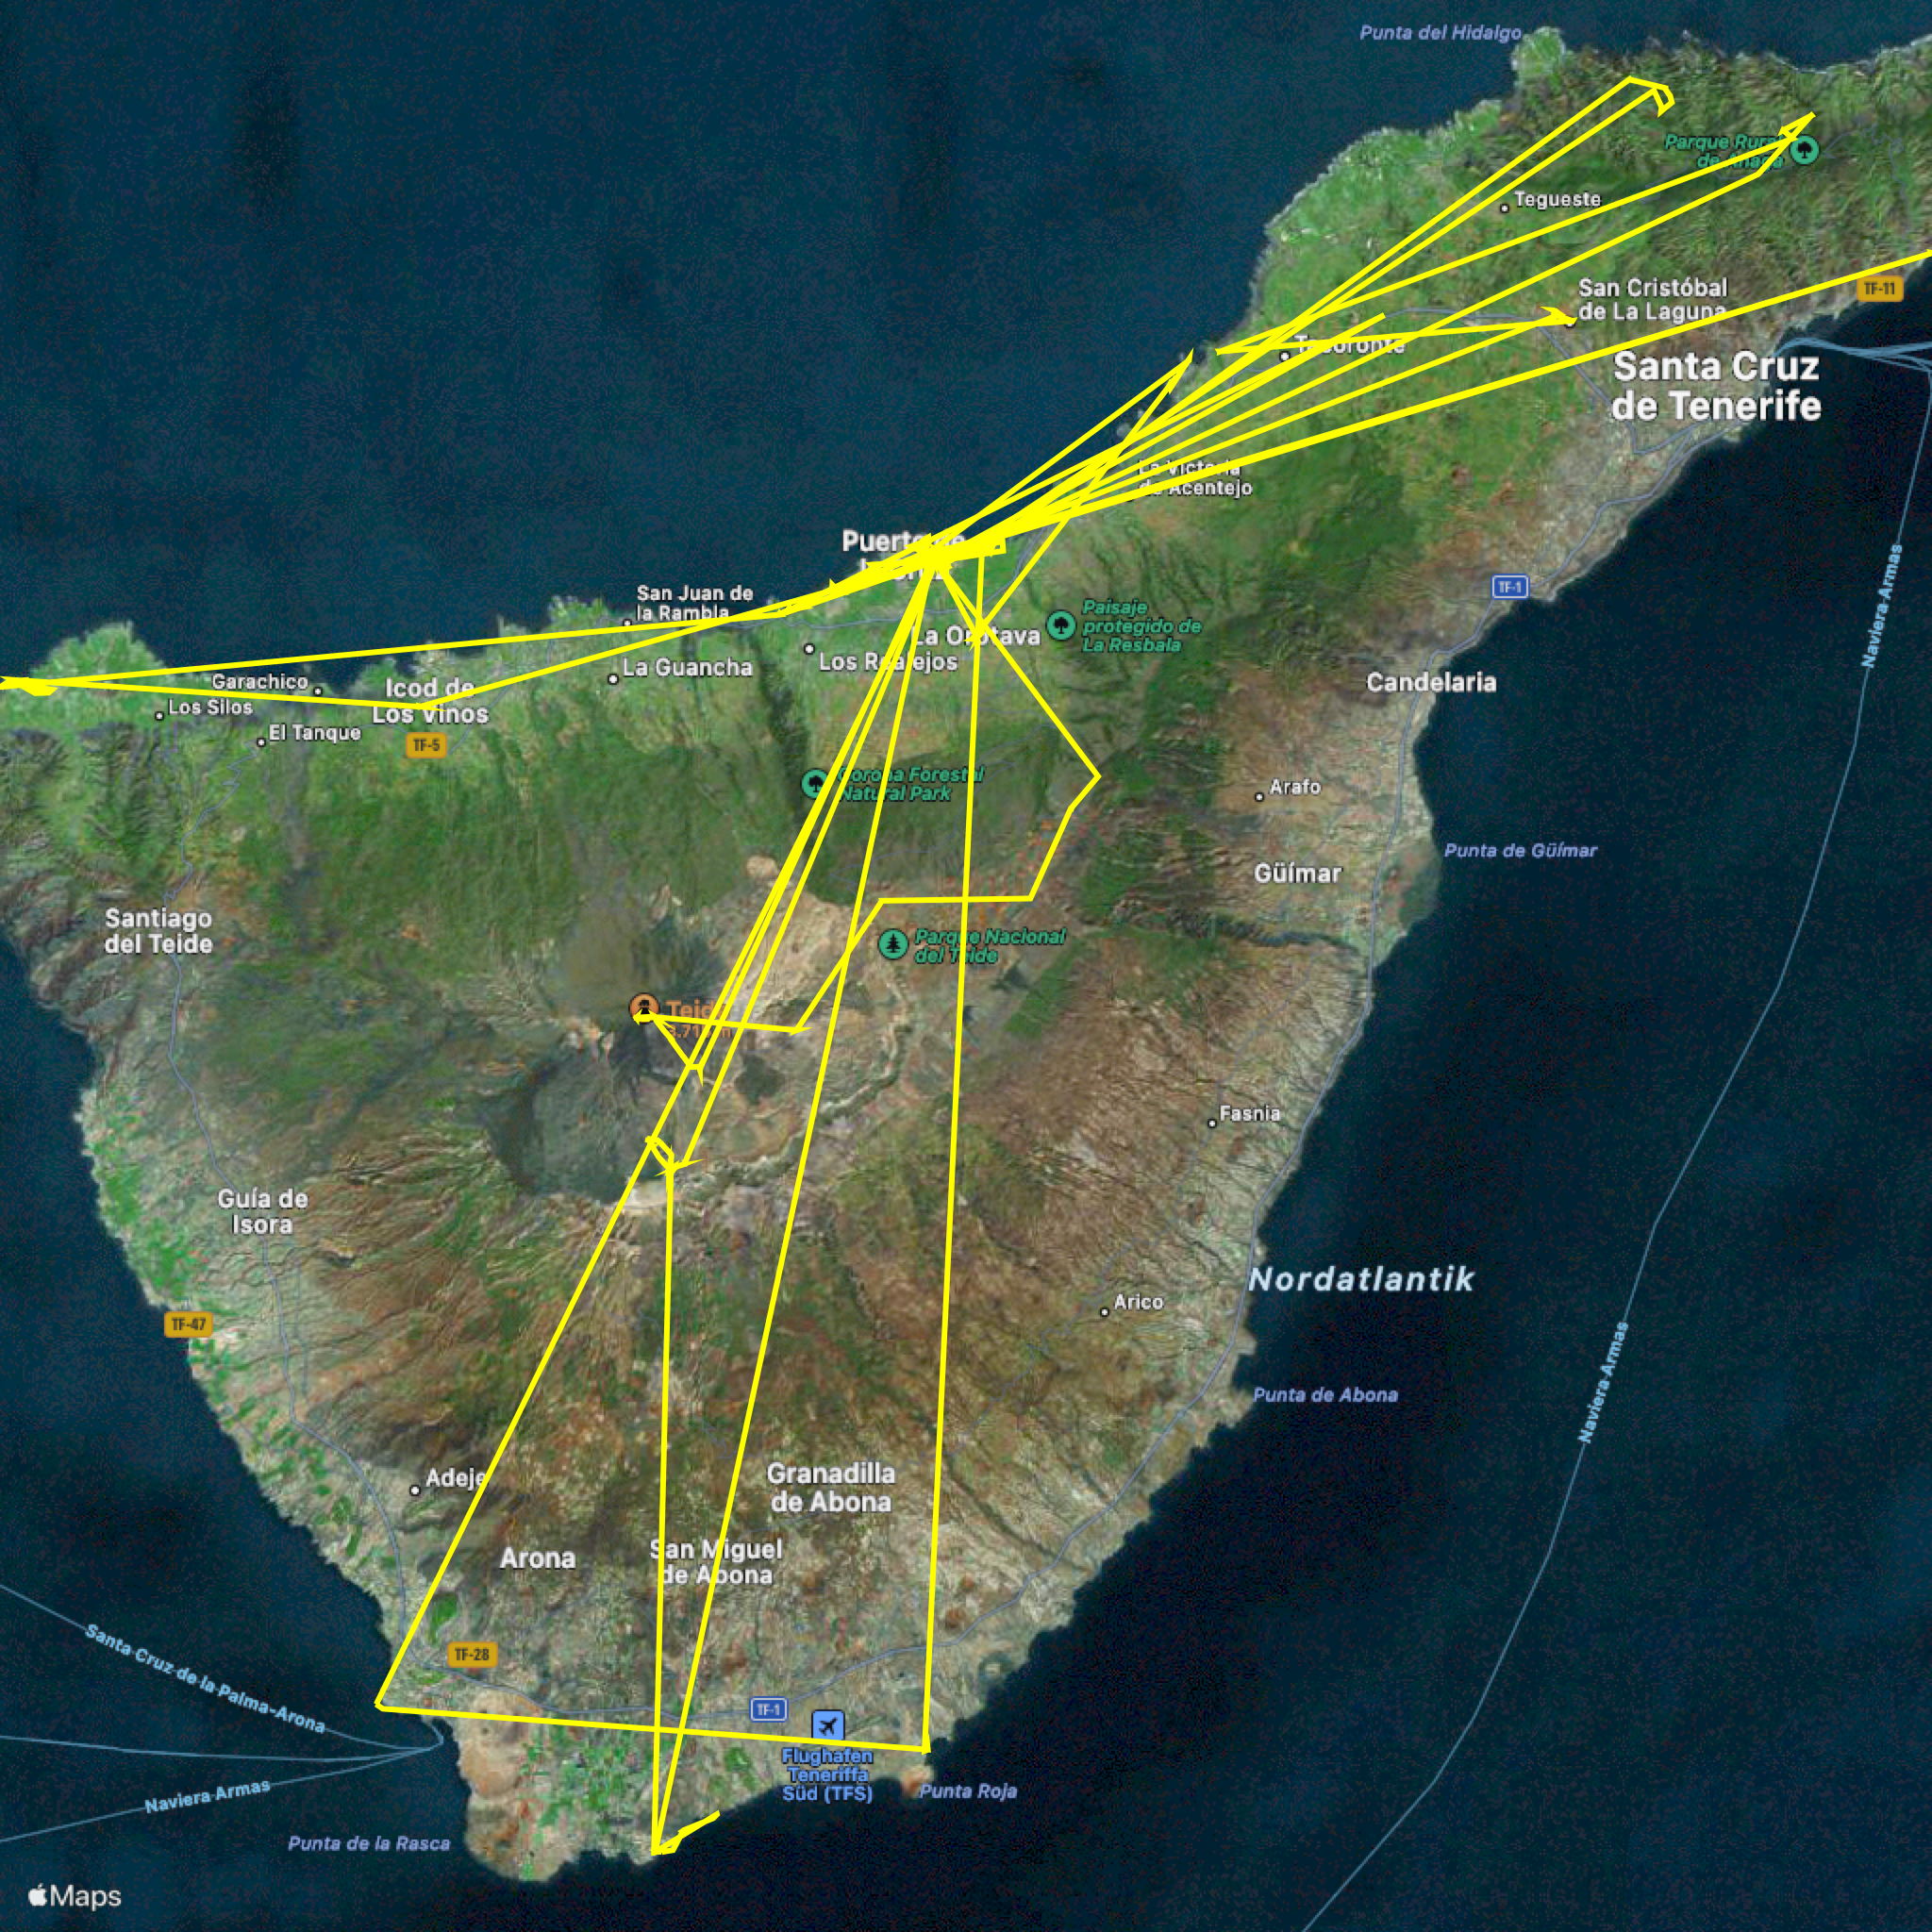
I have created a Pythonista Python script that asks you for a date range (start and end date of your trip) and then draws a satellite map showing where the photos have been taken like the following - it also generates a GPX-Track (Geodata) .gpx file and saves the satellite map as a .png image file in your “files” App and in the clipboard:

You can find the source code here

If you like this script you can pay me a coffee https://www.paypal.com/donate/?hosted_button_id=JBFJMV35LX5AY

Trip to teneriffa

New version

P.S. Based on a discussion in the Pythonista forum user @cvp and I created another version for the same use case that displays an interactive map with image thumbnails that you can zoom in to see for each photo where it was taken.

The source code is here in this gist

What is Pythonista?

Ever wanted to do some Python coding on the go on your iPad (Pro)?
Pythonista is a complete development environment for writing Python scripts on your iPad or iPhone.
The good thing is it does not come just with some standard Python modules (and their documentation) - In addition to the powerful standard library, Pythonista provides extensive support for interacting with native iOS features, like contacts, reminders, photos, location data, and more.

These native iOS features allow you to automate tasks in your iOS or iPadOS workflows and I used these to create the app.

Prerequisites to run the script

  • You have taken a set of photos using your iPhone or iPad while the location-feature was activated (your photos contain the geo-location in the meta-data/EXIF)
  • you know the calender date range (when your trip started and when it ended)
  • you have Pythonista app installed (at the time of writing it cost around 10 € or $)
  • you have some basic programming skills and feel confident to create and run a new Python script in the Pythonista IDE and download my Python script from the github gist web site into the new python script
  • the first time you run the script it asks you to grant permission to access your photo library - if you don’t trust Pythonista app or my script and don’t grant this permission it will not work.

What the script does

  • When you run the script you are prompted to specify the start and end calender date of your trip - these dialogs use the iOS integrated date pickers that you should be familiar with.
    • Just click on the pre-selected date to modify it and then press the “Select trip start date” text to confirm.
    • do the same for the “Select trip end date”
  • now the script is iterating all photos in your photo library and selecting those that
    1. have a geo-location in their meta-data
    2. have a creation date in the selected date interval (start_date <= creation date <= end_date)
  • then the hybrid satellite map is created for the bounds (min to max latitude and longitude) in your photo set and a path is drawn that overlays the map with the points your photos where taken connected in time sequence
  • the map is copied to the iOS clipboard
  • the map is saved as a .png file in the same folder where you stored your python script
  • the geo-location points are saved as a GPX track in the same folder where you stored your python script

What is a GPX track

GPX, or GPS Exchange Format, is an XML schema designed as a common GPS data format for software applications. It can be used to describe waypoints, tracks, and routes. It is an open format and can be used without the need to pay license fees. Location data (and optionally elevation, time, and other information) is stored in tags and can be interchanged between GPS devices and software. (Source: https://en.wikipedia.org/wiki/GPS_Exchange_Format)

I use GPX files on my garmin hiking devices as well as popular apps like komoot or outdooractive

Affiliations

I am in no way related to Pythonista, komoot, garmin or outdooractive and do not get any payment from them.

However if you like this script you can pay me a coffee https://www.paypal.com/donate/?hosted_button_id=JBFJMV35LX5AY

Zero to production in Rust

Zero to production in Rust - a book for the Rust practitioner

TLDR

For the last 3 months I have been working with the book Zero to production in Rust and learned a lot. It is not a book to learn the language but how to use the Rust ecosystem in a professional setup.

Tip

I highly recommend buying the book or donating to Luca as he really must have spent a huge amount of time writing this excellent content - there is even a student discount and a discount for poorer regions of the world.

However, if you first want to get a feel for whether this book is for you you can also follow a selection of chapters on [Luca`s blog](https://www.lpalmieri.com/posts/2020-05-24-zero-to-production-0-foreword/)

What is this book about

This is not a book about learning the Rust programming language, there are other excellent books about the language itself.

Instead the book develops an end-2-end real world web application (newsletter subscription app) to introduce you to the Rust ecosystem:

  • project structure
  • unit and integration testing
  • build setup
  • dockerised builds
  • continuous integration with github actions including formatting (cargo format), linting (clippy), security dependency checking (cargo audit), test code coverage (tarpualin)

The book uses a select, well-integrated subset of the Rust crates relevant to a web application with HTML form frontends and an async backend with persistence

  • actix-web
  • tokio async runtime
  • postgres database for domain data
  • redis key-value store for session data
  • reqwest for REST clients (called from the backend)
  • and numerous other crates required for the example use case which integrate well with the actix async model

The book also shows you how to deploy your application in a production environment

  • using DigitalOcean as a platform to run the databases and containers
  • using Postmark’s REST API as a back-end to send out the newsletters and subscription confirmation emails

Each step in the development of the sample project expands on the previous section.
There is a Github branch for each chapter available so that you can also focus and start with individual chapters if you want and don’t have the time to go through all the content.

My learning experience

I think I spent about 60 hours completing the book, following all the steps in my own development environment and doing most of the optional exercises.
Sometimes I deviated from the book and used more recent versions of the crates - this resulted in subtle bugs that I hat to debug to get the test cases green again, which was perhaps the most rewarding learning experience.

I would highly recommend the book to those who think they have already learned the language but have not yet worked with Rust in a professional environment.
Even if you have done CI/CD pipelines and container deployments with other languages and frameworks you will learn a lot of Rust specific things like multi-stage Docker builds with “chef” to drastically reduce build times.

I kept track of my progress in my own github repo.
Some readers may find it useful to update the examples to more recent versions of the Rust crates - the book was written in 2020/2021 and some crates needed to be updated - for example to get rid of security vulnerabilities or build problems that were found/created after the book was published.

How to select Rust crates

How to select Rust crates

TLDR: This post contains some considerations for selecting rust crates and recommends to build toy examples to verify the selection. It also provides a toy CRUD example for the stack: axum-sqlx-sqlite-utoipa

Rust has a limited standard library

Rust is a very powerful, modern programming language.

However the challenge in using it for non-trivial things comes from the wide variety of 3-rd party dependencies (called crates) that you need.

The language itself contains a rather limited standard library.

For example when you want to create a web service you need additional crates.

Would the right crate for x please stand up

However there is a multitude of crates available (e.g. on crates.io ) and it is difficult to assess for each crate:

  • is it still actively maintained or already considered deprecated by the Rust community
  • is it safe code or does it use a lot of “unsafe” code (memory safety is a big advantage of Rust and crates which do not use idiomatic or safe approach might introduce problems)
  • is it well maintained and does not introduce a lot of security issues
  • does the crate not introduce a transitive list of other problematic dependencies which impacts compile and build times

For example for web backends we have

  • Rocket - which is widely used but recently seems to be no longer well maintained
  • actix-web - which seems to be the performance leader for production projects
  • axum - the newcomer which uses safe code and may replace actix-web for hobbyist projects
  • and countless others

Even if the selection of a single crate is sometimes quite easy, selecting a combination of crates that work together as a stack may be difficult

  • one crate may be sync and the other async - so they are not compatible
  • even if both crates are async they may use incompatible async runtimes (std versus tokio)
  • even if they both use tokio async runtime they may have incompatible or redundant type systems (for error handling, or primitives like HTTP requests)

What we can do to address the problem - Example on building a Rest CRUD web service

To work around that challenge I find it best to implement small educational samples using the combination of crates that I plan to use for a project before I actually start on the real project.

This allows you to save time on your real project - you will not be forced later to refactor your real project to a new crate because you have already verified the functionality with a toy example.

Also creating a limited example is much faster and you already find examples in the web that help you to quickly stick the components together.

So by focusing on the technology selection rather than your own domain problem you come to a conclusion/selection more quickly.

Here is a combination of crates for building a CRUD Rest web service including persistence (database) that I found to be

  • safe
  • modern
  • raising in adoption and community support
  • all based on or compatible with tokio async runtime

Crate selection for toy project for CRUD Rest web service

  • axum - for web
  • sqlx with sqlite - for persistence
  • utoipa - for OpenAPI/Swagger doc

You can find my example which uses this stack here

https://github.com/Bodobolero/axum_crud_api

The example includes error handling and e-2-e testcases.

Next steps

I plan to build the same sample app with actix-web and sqlx with postgres instead of sqlite.
To learn actix-web I decided to follow Luca Palmieri’s book Zero to production

I also want to extend it with a Rust WASM client implemented with yew

I can then make an informed decision whether to implement my real project with axum or actix-web and whether I will stick to sqlx or instead consider an ORM like diesel instead.

Arduino Kurse im Herbst 2022

This post is written in German because it addresses a German audience - the participants of Arduino classes held in German language.
For your convencience here is the Google translate link into English

Übersicht über Arduine Kurse an der VHS Tübingen in diesem Herbst

Auch diesen Herbst bieten wir wieder unsere beliebten Arduino-Kurse an - meldet Euch schnell an, die Teilnehmerzahl ist begrenzt:

222-55100 Programmieren lernen mit Arduino - Schnupperkurs

  • 2 * 3 Stunden am Samstag 12.11. und 19.11.2022 von 14.00-17.00 Uhr
  • kostenlos

222-55101 Programmieren lernen mit Arduino Sensor Kit - Einstiegskurs

  • 2 * 3 Stunden am Samstag 26.11. und 3.12.2022 von 14.00-17.00 Uhr
  • 100,00€ - Kurspreis inklusive Hardware

222-55102 Grundlagen der Arduino Internet of things (IoT) Cloud

  • 2 * 3 Stunden am Samstag 10.12. und 17.12.2022 von 14.00-17.00 Uhr
  • 100,00€ - Kurspreis inklusive Hardware

Picture created by Midjourney AI https://www.midjourney.com/home/

Warum Arduino und was wollen wir damit erreichen?

Arduino ist die ideale Einstiegsplattform in die Welt der Maker und des Programmierens:

Arduino verknüpft einfache Programme mit der physikalischen Welt, denn man programmiert kleine Computer, sogenannte Microcontroller, die mit der Welt interagieren und z.B. Sensordaten messen oder Leds und Motoren steuern.

Man kann also den Effekt seines Programmes unmittelbar sehen oder hören und kann innerhalb kurzer Zeit Maker-Projekte wie Wetterstation, Beleuchtungssteuerung, Messen und Loggen von Strom, Wasser, einfache Robotikaufgaben etc. erlernen und selbst realisieren.

Es gibt zwar mittlerweile auch im Niedrigpreis-Segment andere beliebte Plattformen wie Raspberry Pi oder kompatible Controller (wie ESP32), aber die Arduino Plattform ist immer noch die am besten dokumentierte Plattform mit der besten Unterstützung durch einen grossen Kreis von Anwendern - so bekommt man jederzeit Hilfe zur Selbsthilfe bei den eigenen Projekten.

Die Konzepte, die wir in unseren Kursen vermitteln können dann aber auch auf andere Plattformen und Programmiersprachen übertragen und angewandt werden.

Wenn Ihr Euch vorab etwas in die Arduino-Welt einlesen wollt - hier sind links zu der englischen Arduino-Webseite und dem deutschsprachigen Funduino

Arduino Doc
Arduino Webseite

Funduino

Kursbeschreibungen

Die Kursbeschreibungen im Detail findet ihr auf der VHS-Seite - siehe Links oben.
Hier nur noch etwas mehr Details über die jeweilige Zielgruppe und Kursziele:

Schnupperkurs

222-55100 Programmieren lernen mit Arduino - Schnupperkurs

Diesen Kurs bieten wir kostenlos an, denn hier benötigen wir noch keine Hardware.
Alle Programme werden auf einem Simulator (auf dem PC) geschrieben.

Dieser Kurs ist für absolute Anfänger geeignet, die ausser der Benutzung eines PCs keine Vorkenntnisse mitbringen.
Wir verwenden in diesem Kurs den Arduino Simulator Autodesk Tinkercad

Kursziel ist es, ein Grundverständnis für die Funktionsweise eines Computers am Beispiel des Arduino Microcontrollers zu entwickeln und erste einfache, eigene Programme zu entwickeln, die z.B. Messwerte von Sensoren erfassen oder LEDs zum blinken bringen.

Die Programme werden zunächst “visuell programmiert” - erst im 2.Teil verwenden wir dann die Arduino Programmiersprache C.

Wir empfehlen Anfängern diesen Kurs vor den anderen Kursen zu belegen.

Geeignet ist der Kurs auch wenn ihr euch nicht sicher seid, ob das das richtige für euch ist und ihr erstmal reinschnuppern wollt, bevor ihr 100€ für die Hardware in den anderen Kursen investiert.

Sensorkit

222-55101 Programmieren lernen mit Arduino Sensor Kit - Einstiegskurs

In diesem Kurs verwenden wir echte Hardware - einen Arduino Uno mit einem Sensorkit - und erstellen Programme auf dem PC, die wir dann auf dem Arduino zur Ausführung bringen.

Diese Programme lesen Sensorwerte (Temperatur, Luftfeuchtigkeit, Beschleunigung) des Sensorkits und kontrollieren Aktoren wie Buzzer oder LED.

Die Programme werden in der Arduino Programmiersprache C erstellt.

Auch dieser Kurs richtet sich an Anfänger in der Programmierung und wir werden alle Konzepte über Microcontroller und Programmieren von Grund auf erklären.

Arduino IoT Cloud

222-55102 Grundlagen der Arduino Internet of things (IoT) Cloud

Die Arduino IoT Cloud ermöglicht es, Arduinos und Arduino-kompatible Geräte mit dem Internet zu verbinden um dann z.B. Messwerte auf einer Smartphone-App anzuzeigen und zu visualisieren oder Geräte, die vom Arduino gesteuert werden, über eine App aus der Ferne zu steuern.

Arduino Iot Cloud Webseite auf Deutsch

In diesem Kurs setzen wir Vorkenntnisse mit Arduino-Programmierung voraus und fokussieren auf die Anbindung an die IoT Cloud.
Das heisst diese Kenntnisse solltet ihr entweder mitbringen oder davor einen der beiden anderen Kurse besuchen.

Wir werden also Arduino Grundlagen aus den Anfängerkursen nur kurz wiederholen und starten dann direkt mit einer
Einführung in die Arduino IoT Cloud (Registrieren von Endgeräten, Things, Devices, Variablen, Dashboard).

Dann erfassen wir Sensordaten mit einem Arduino Sketch (Programm)
und speichern diese Sensordaten in der Arduino IoT Cloud.
Wir erstellen dann eine App die den Sensor-Datenverlauf auf dem Smartphone anzeigen.
Ausserdem werden wir den Sensor-Datenverlauf in Google Sheets speichern und visualisieren.

LoRaWAN ist eine Übertragungstechnik, die es erlaubt, Geräte von überall kostenlos mit der Cloud zu verbinden - ohne dass ein WLAN in der Nähe ist.

Auch diese Technik lernen wir kennen und erfahren, für welche Projekte LoRaWAN geeignet ist und wo besser eine WLAN-Anbindung benutzt wird.

Eindrücke aus früheren Kursen

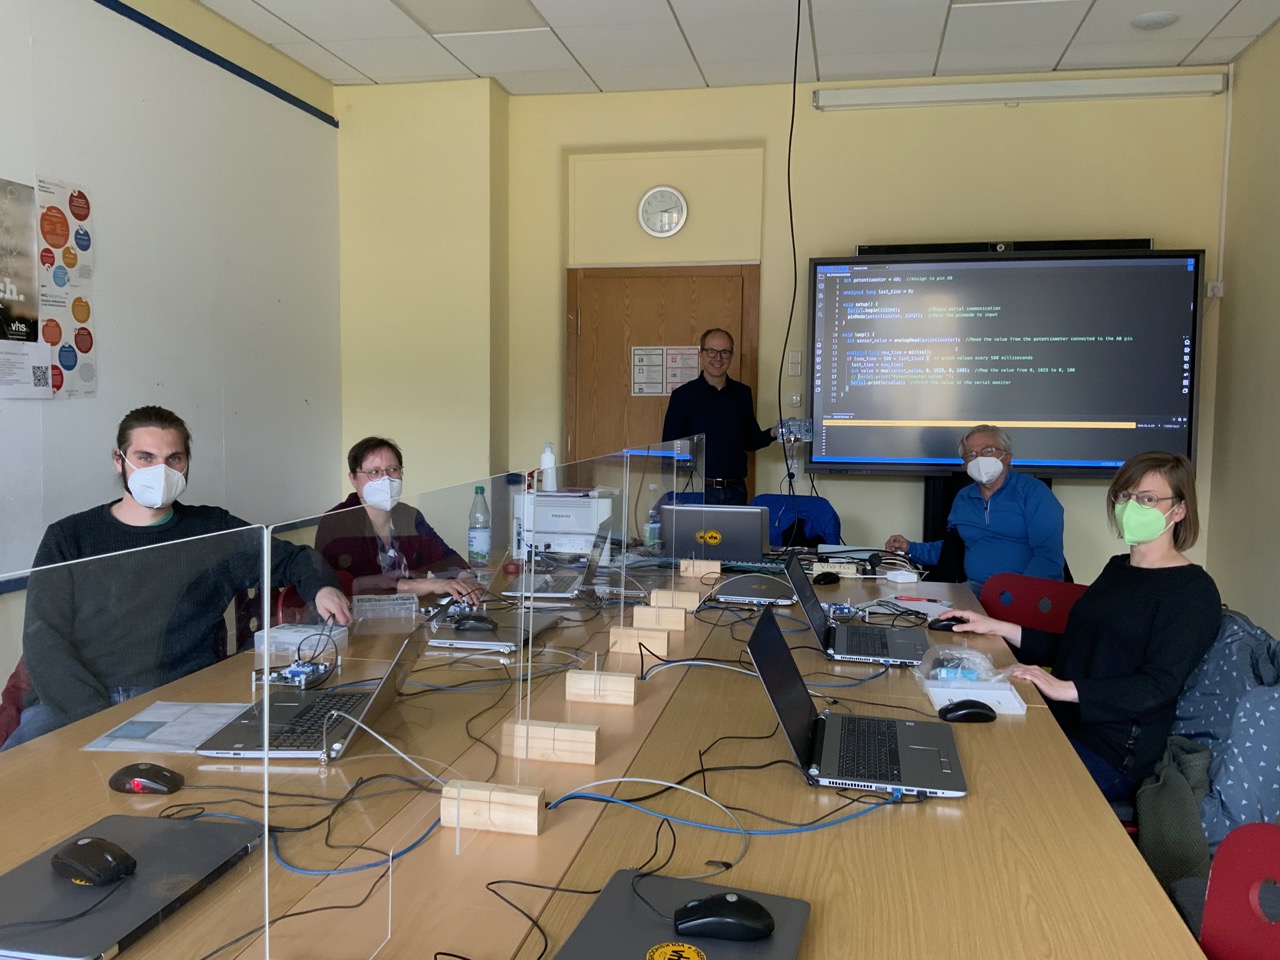
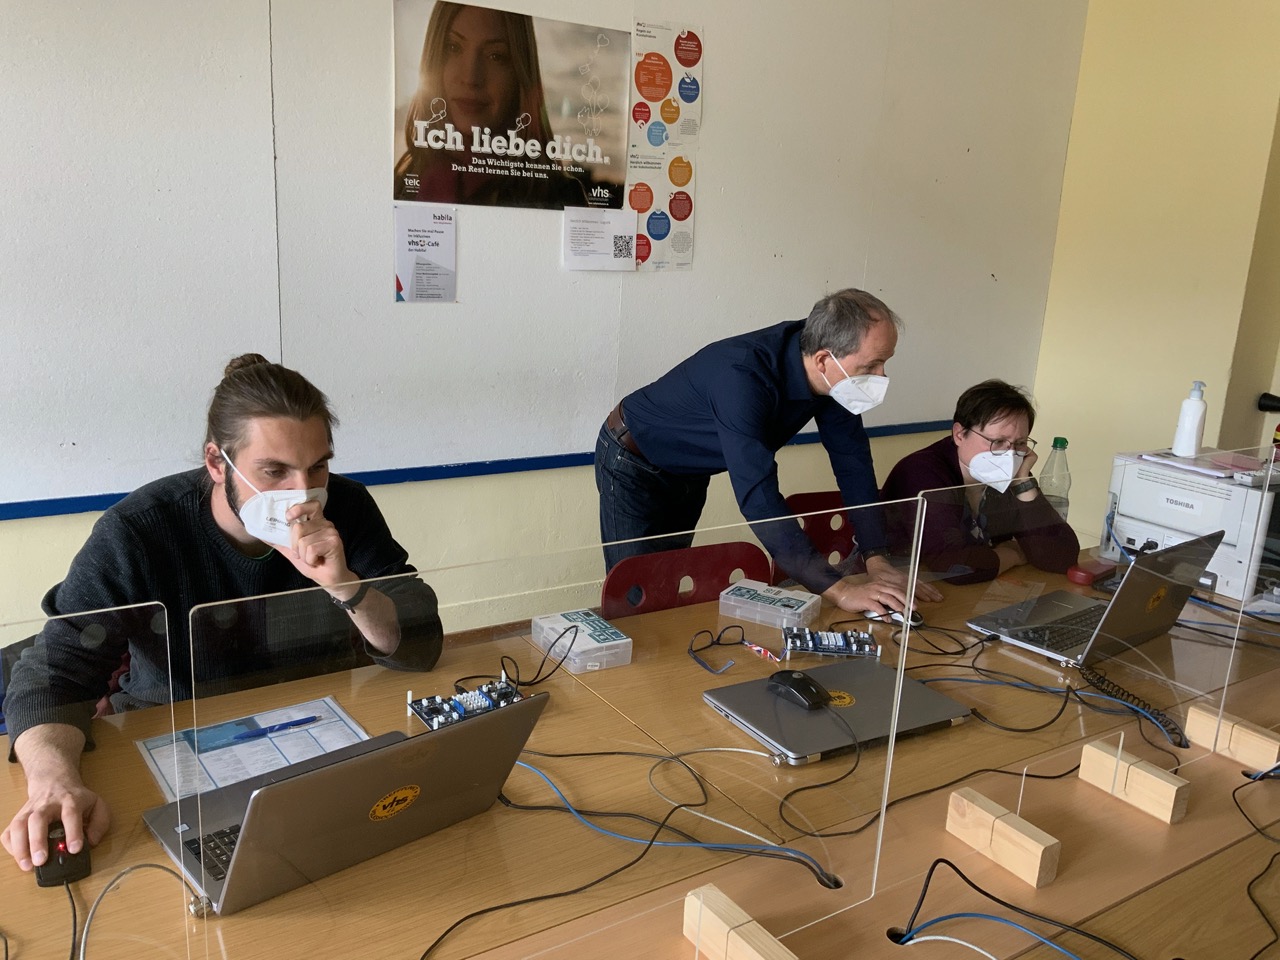
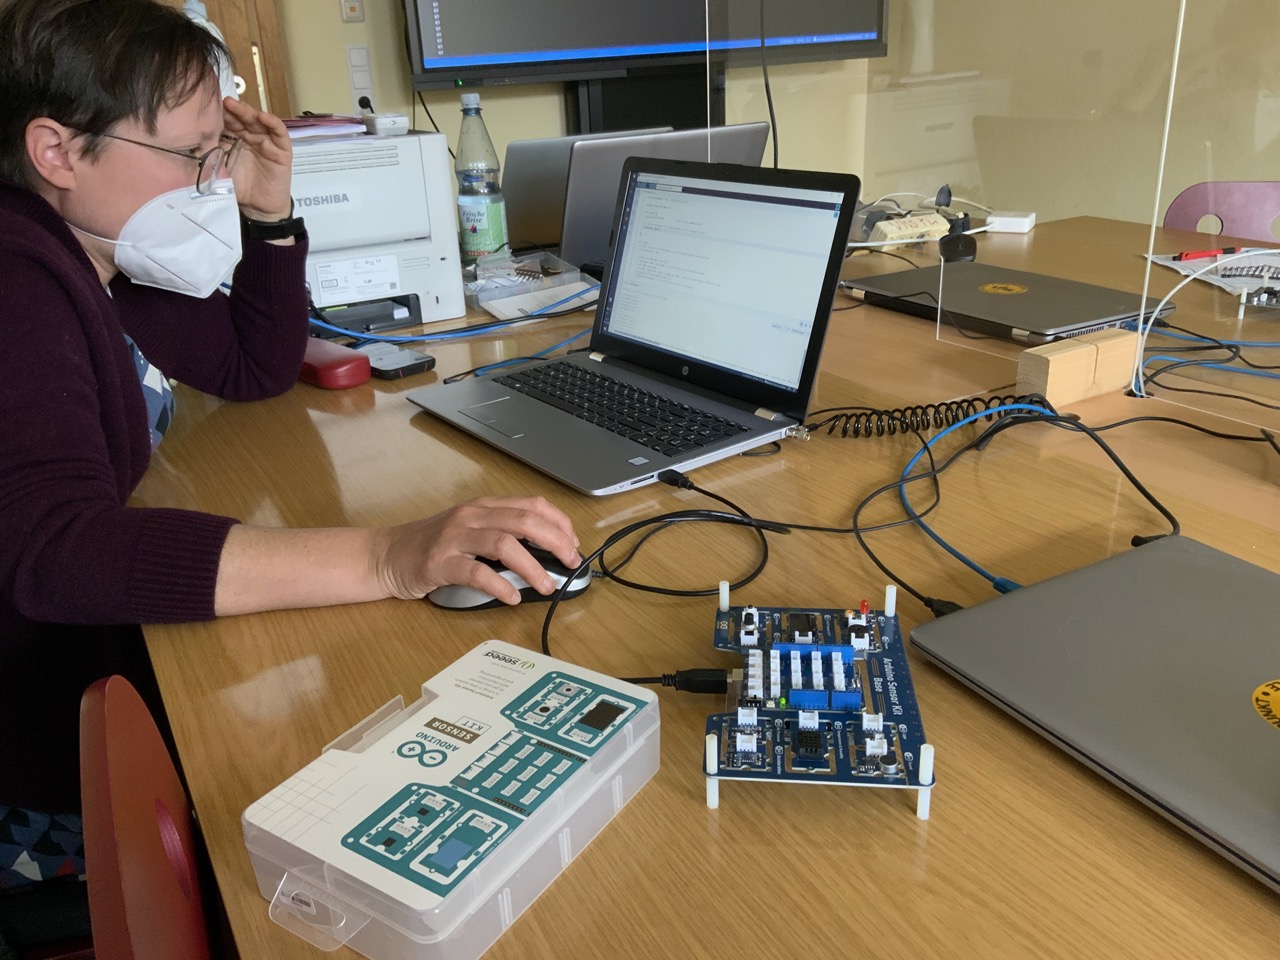
Hier noch einige weitere Bilder von früheren Kursen - auch wenn ihr auf den Bildern keine Kinder seht - wir bieten unsere Kurse explizit auch für Kinder und Jugendliche ab 14 Jahren an - unter 14 Jahren bitten wir um Begleitung eines Erwachsenen.

Wie man sieht stammen die Bilder aus der Zeit der Covid-Pandemie - wir hoffen natürlich alle, dass wir die Kurse diesmal ohne Maske durchführen können und freuen uns auf Euch!

Arduino Kurse

Arduino Kurse

Arduino Kurse

Reinforcement Learning

Lessons learned as a novice in reinforcement learning

I recently attended the execellent Coursera machine learning specialization by the famous Andrew Ng.

https://www.coursera.org/specializations/machine-learning-introduction

While most of the courses was a repetition of things I already know
so I rushed through it in a few hours - what really got my attention was
the reinforcement learning part in course 3. This was a new algorithm for me.

In the course the used a lunar lander example and everything was well prepared (simulator, hyperparameters) so this seemed very easy:

https://www.coursera.org/learn/unsupervised-learning-recommenders-reinforcement-learning/lecture/UrcMA/mars-rover-example

So I decided let’s give it a try and implement your own reinforcement
simulation and model based on some Arduino hardware that I already had.

And to my surprise it was much harder than expected to transfer the skills
from the course to a real-life experiment.

Here are my lessons learned:

(You can also find this in my public github repo under https://github.com/Bodobolero/CarSimulator/blob/main/README.md)

CarSimulator

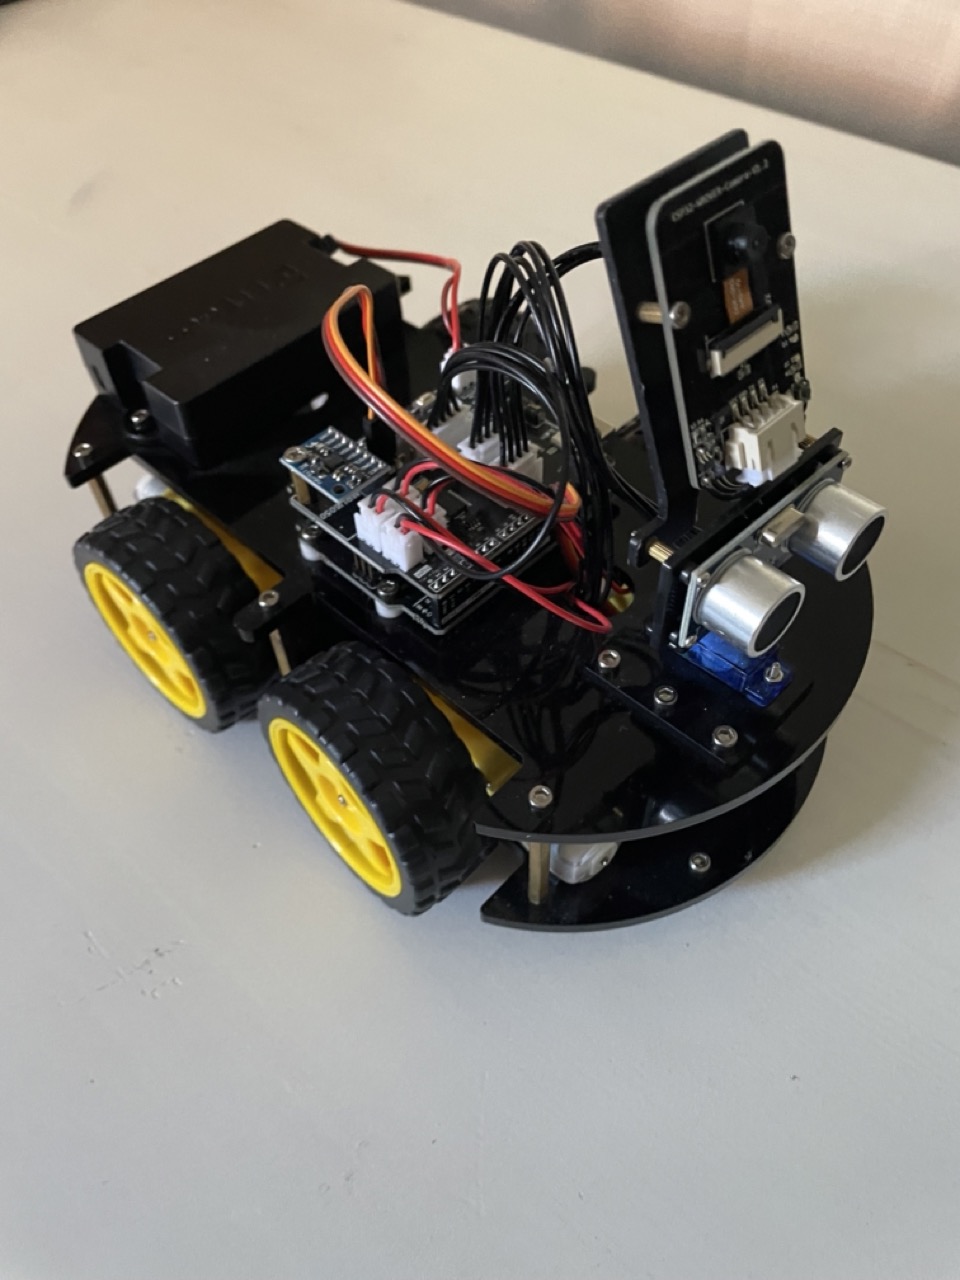
Car simulator to try reinforcement learning of line tracking with Arduino Robo Car

Picture of Arduino robot car

This car has 3 infrared sensor values in the front directed to the floor
that can be used for line tracking.

Lessons learned from playing with reinforcement models

TLDR

  • real life experiments take time and it is worthwhile to create a digital twin of your setup (simulator)
  • it is important to carefully consider a good reward function
  • a good visualization of the steps taken by the model is essential to understand where the model still fails
  • it is important to provide enough state to the model that it can achieve its goal
  • when a model works fine in simulation it still may have problems in real life because in real life sensor values have a lot of variation and noise
  • hyperparameter tuning is more an art than a science

Creating a simulator

Conduct some experiment in real life to collect some numeric measurements of how actions/steps result in state changes.

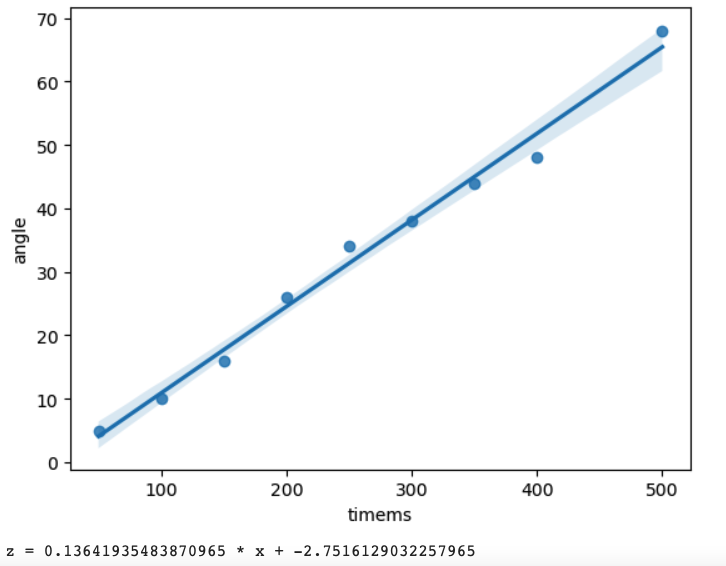
You can then extrapolate from the measurements using simple statistics like linear regression to derive
the mathematical formulas needed for your simulator’s modeling:

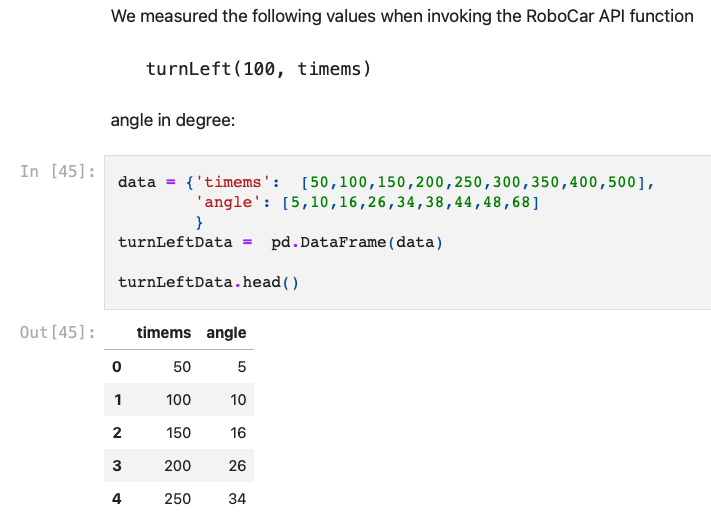
In this example I collected different values for left rotation with different time intervals

My measurements

and then used python statistics and visualization packages to create the formulas:

1
2
3
4
5
6
7
8
9
10
11
import matplotlib.pyplot as plot
import seaborn as sb
import pandas as pd
import numpy as np
...
p=sb.regplot(turnLeftData.timems,turnLeftData.angle)
plot.show()
x = p.get_lines()[0].get_xdata()
y = p.get_lines()[0].get_ydata()
a, b = np.polyfit(x, y, 1)
print ("z = {} * x + {}".format(a, b))

My measurements

for more details see https://github.com/Bodobolero/CarSimulator/blob/main/Measurements.ipynb

A good reward function

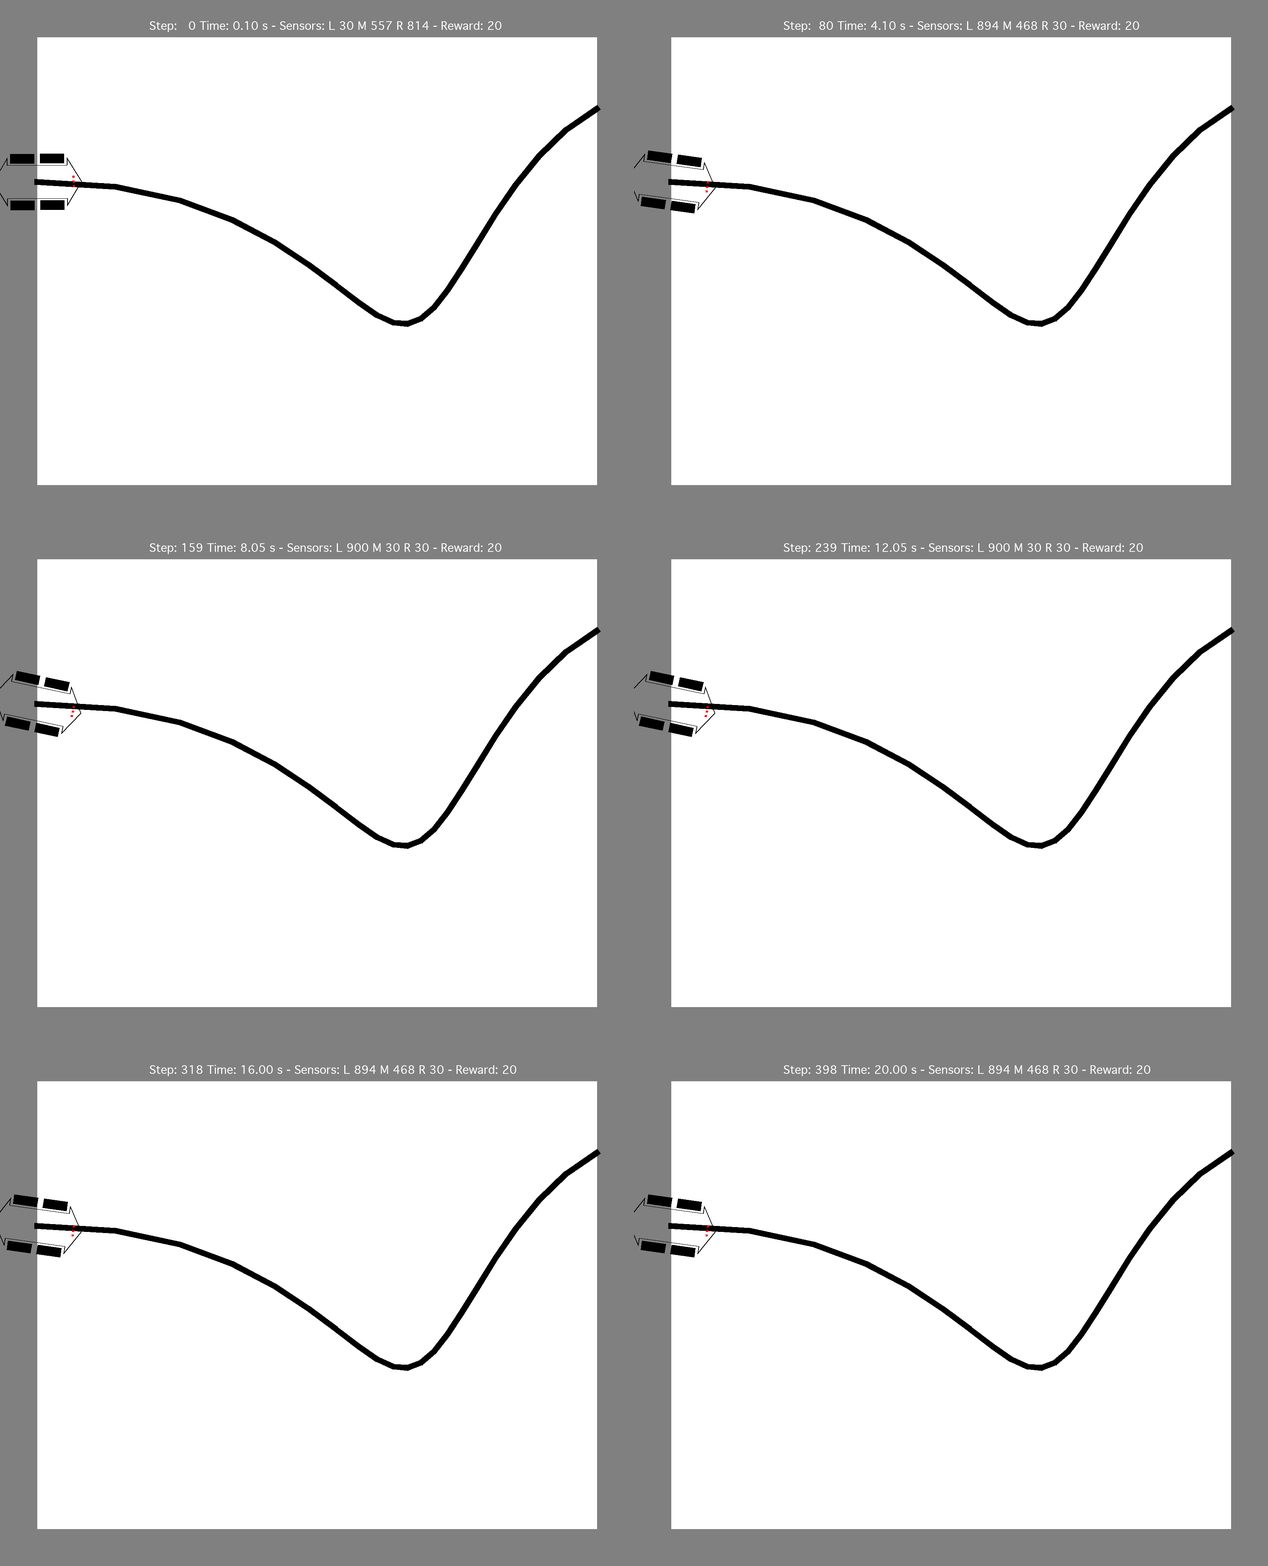
My initial reward function rewarded the car when a sensor was on the line after a step. The most reliable way to achieve that was by staying in the same position but just repeatedly turn left and right with the nose without moving:

Bad reward function

After I modified the reward function to not provide any rewards on a position that was already reached previously the model learned that when it lost the line, the most reliable way to go back to the line was to always turn left until it reached the line again - however this caused the model to turn halfway and run back to the starting point:

Bad reward function 2

I tried different things like

  • keeping a history of prior positions (and not reward for prior positions)
  • increasing the reward for increasing x values

However by only tuning the reward function I could not achieve the goal.

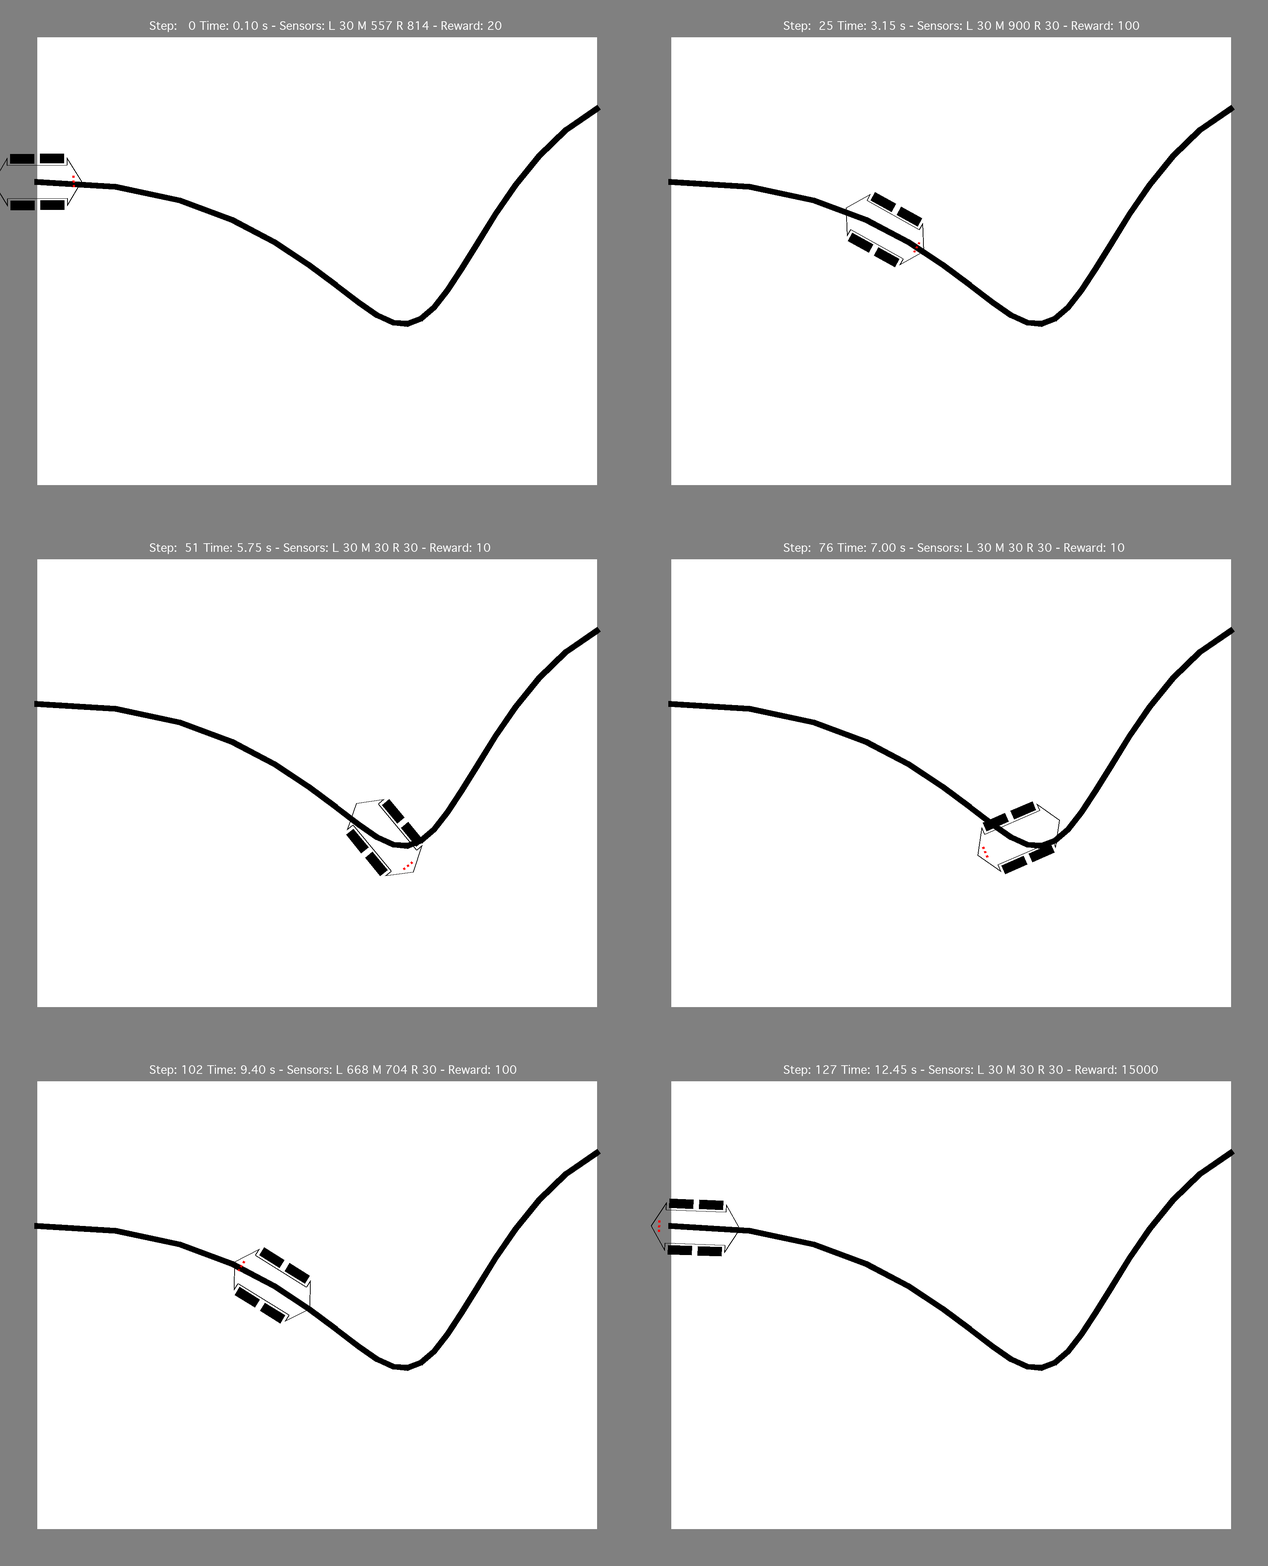
A good visualization helps debugging

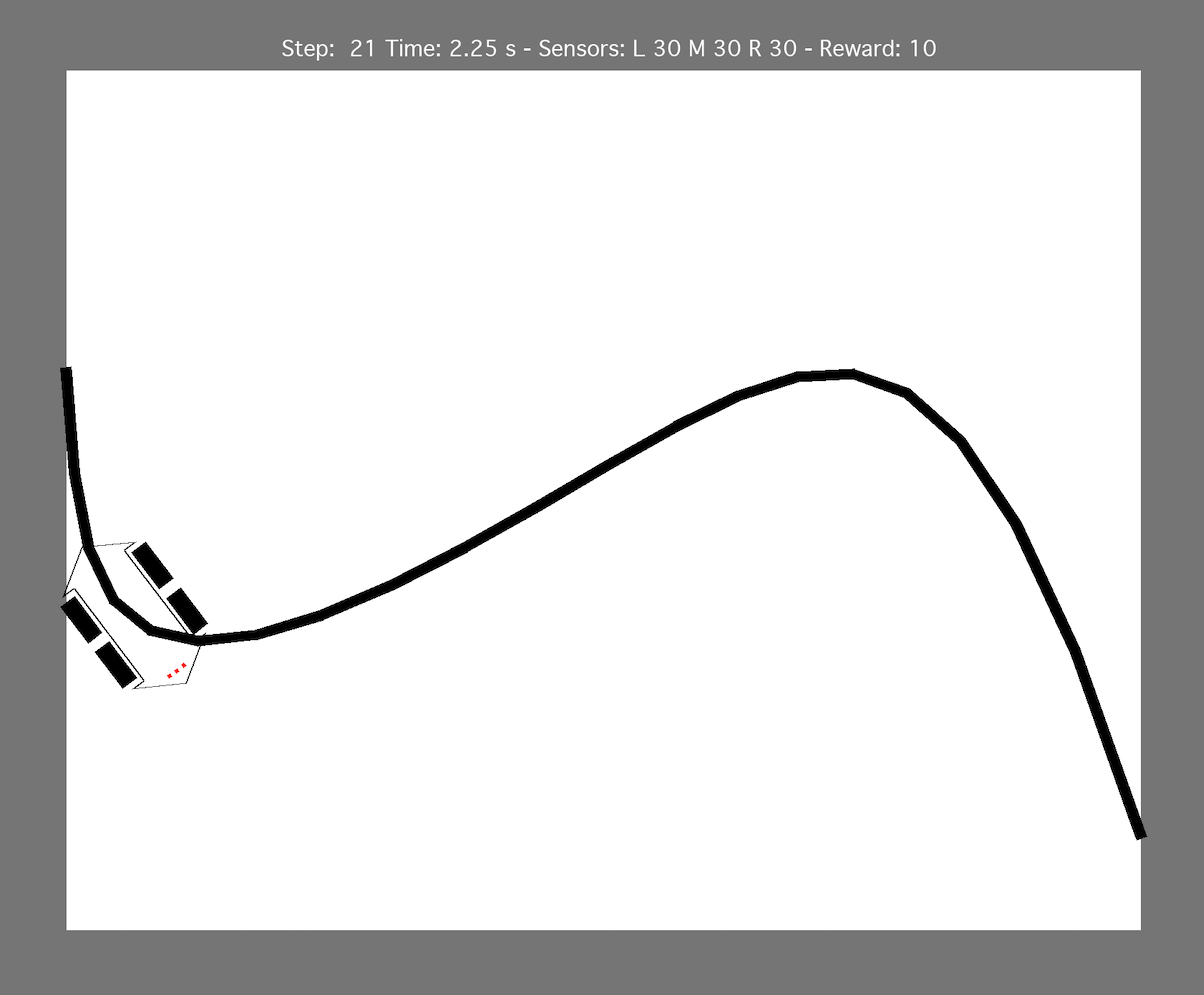
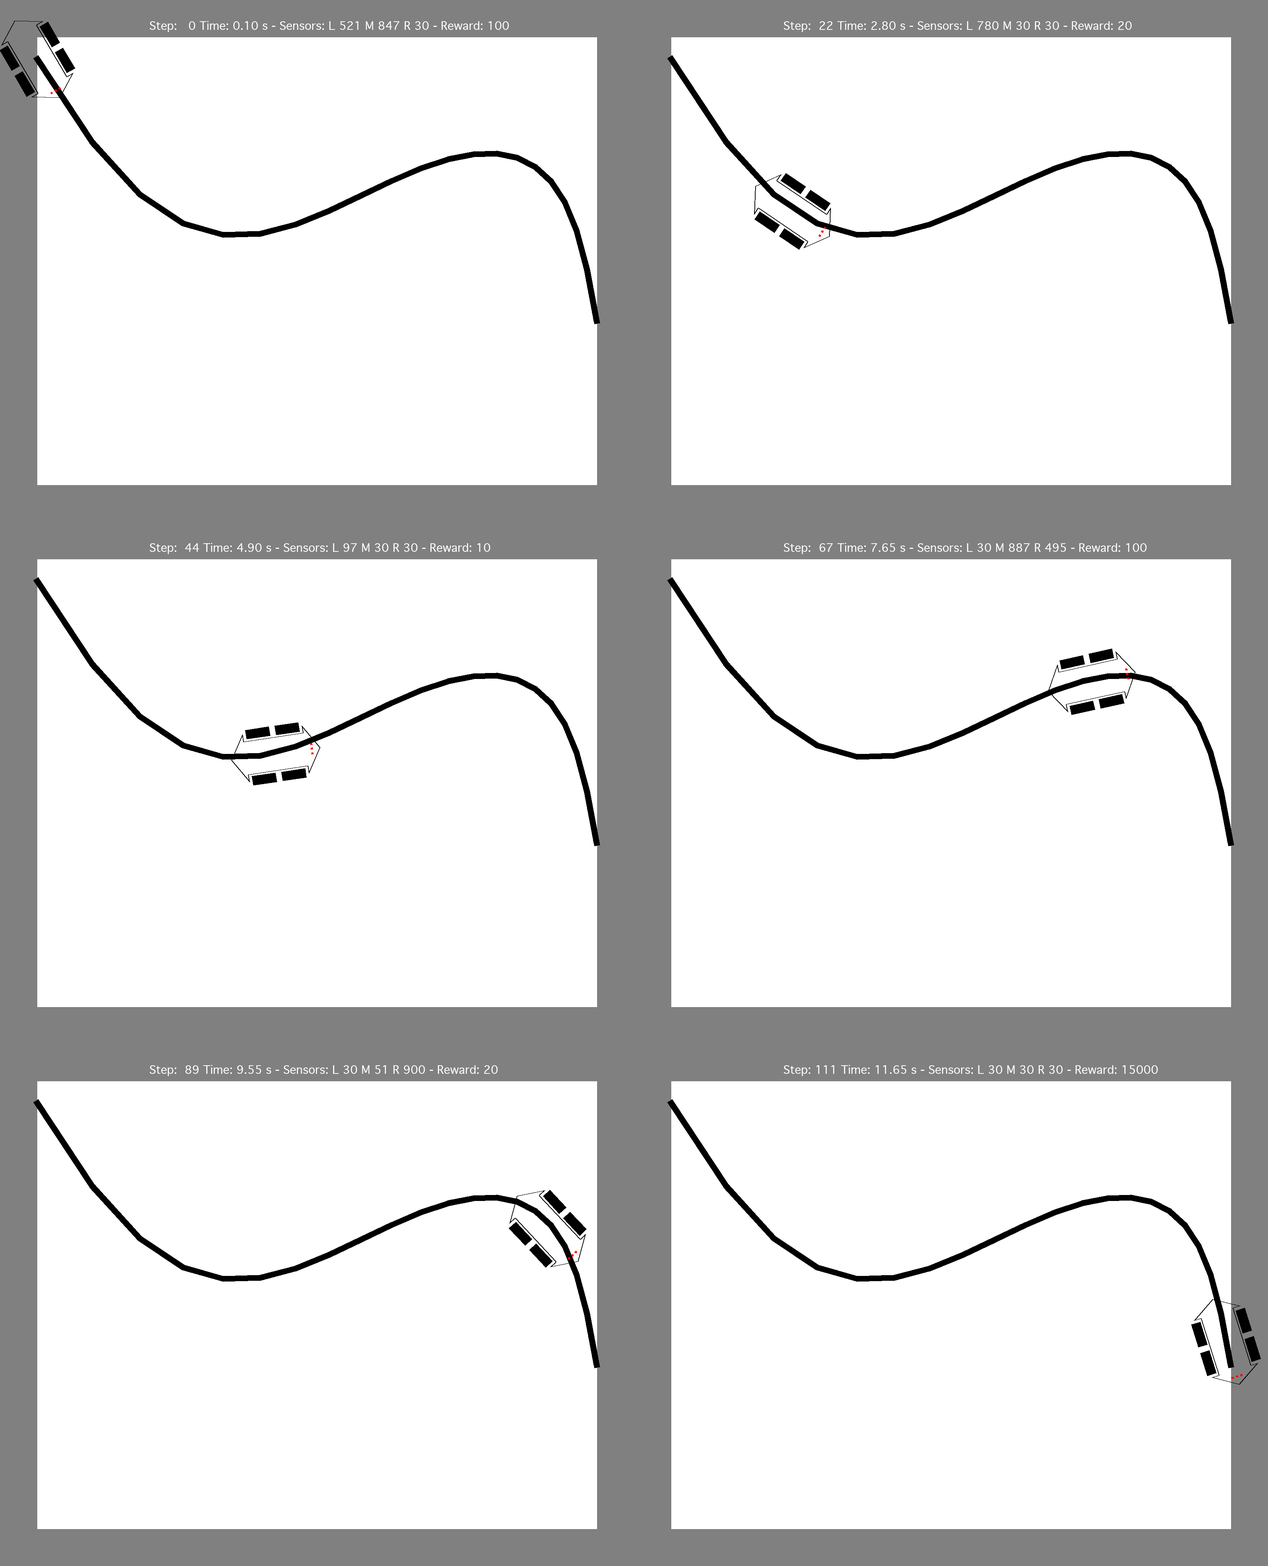
I generated an animated gif where each model step was a frame. By stepping through the .gif (with Macos Preview) I could exactly understand where the model failed and what the problem was, as in this example where all sensors where off the line
and even a human being could not decide what to do now (turn left or right) without additional context:

What to do now ?

Hyperparameter tuning and when to stop learning

Learning rate, soft update, experience replay and hyperparameters heavily influenced how quickly the
model converged and for some combinations the model oscillated around sub-optimal solutions.
Tuning these parameters is an error prone and time consuming process.
When changing the reward function the achievable total return of the model changed significantly and it
was thus hard to decide when to terminate the learning loop.

I ended up with the following hyperparameters by experiment

1
2
3
4
5
6
7
8
9
GAMMA = 0.995             # discount factor
ALPHA = 1e-2 # learning rate
TAU = 1e-2 # soft update
NUM_STEPS_FOR_UPDATE = 4 # perform a learning update every C time steps
STEPS_SENSOR_HISTORY = 2
MEMORY_SIZE = 10_000 # size of memory buffer
MINIBATCH_SIZE = 64 # mini-batch size
E_DECAY = 0.995 # ε decay rate for ε-greedy policy
E_MIN = 0.01 # minimum ε value for ε-greedy policy

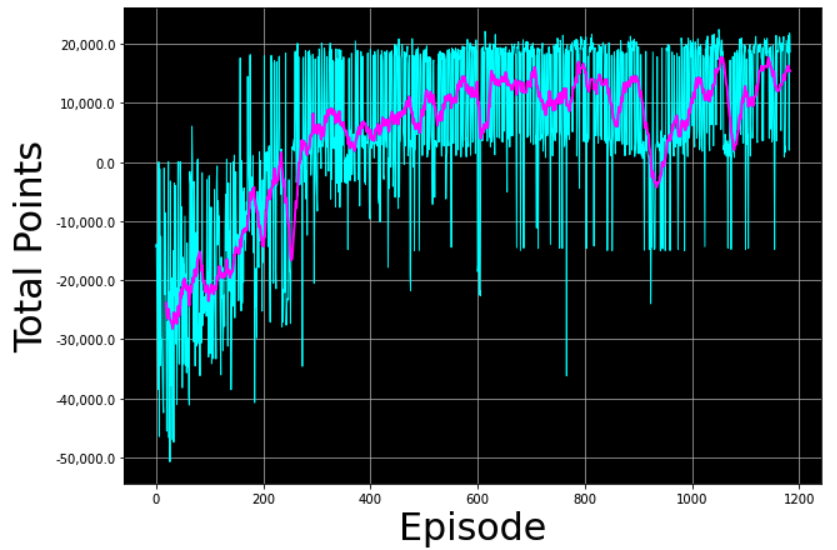
I made the decision when to stop the learning loop based on a visual representation of the total reward history

total reward history and floating average

for details see https://github.com/Bodobolero/CarSimulator/blob/main/LearnModel.ipynb

Enough state relevant for the goal

With a single time point of sensor values even a human being could not decide what to do when the car has already left the line. Without knowing the relative position to the line you can not reliably decide whether to turn left or right.

However by providing the sensor values of two prio steps in addition the model had enough state to decide
if it previously left the line on the left or on the right and in which direction to turn.

So garbage in -> garbage out. If you do not provide enough state the model can not copy with all situations.

After adding a sensor history of two time steps to the state tensor the model suddenly worked well:

Model working with two additional time steps in state

Model optimized in simulation may still fail in real ife

My simulator did not correctly simulate different and complex ligthing conditions:

In the simulator

  • the line always had the same width
  • the line was always completely black
  • the canvas was always completely white
  • the same movement always caused the same delta x and delta y

In real life

  • where the tape makes a curve the line may narrower than the specified width
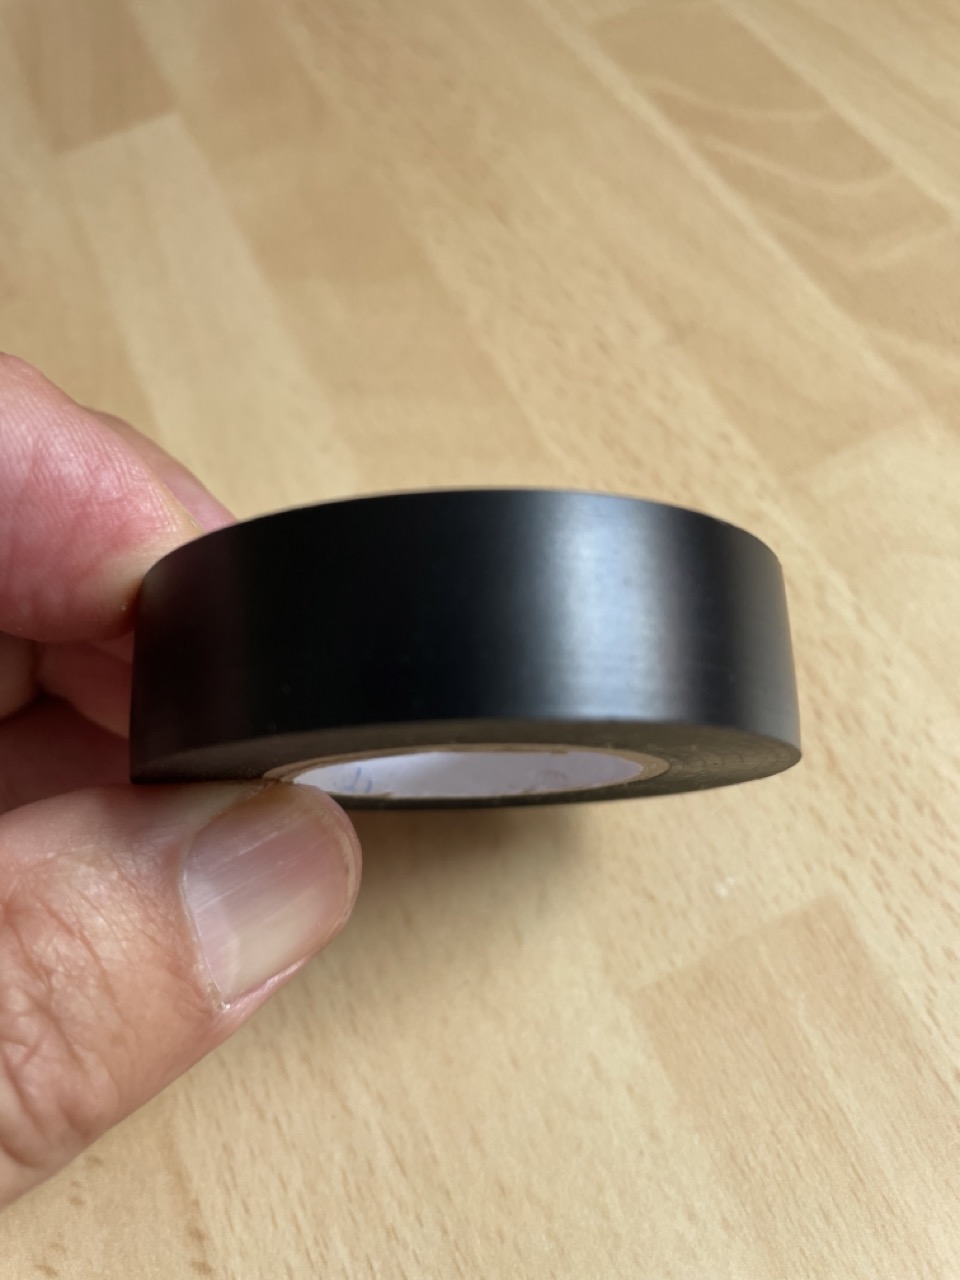
  • the line has a reflective surface causing wide variation in sensor values when the sensor is over the linereflective tape
  • the sensor was not completely flat (white table cloth) and this caused some shadows with different sensor values
  • the car sometimes slipped on the surface causing different delta x and delty y

Finally I got it working by adding a (programmatic, not learned) calibration step that adjusts the sensor values to the
current lighting conditions and feeds the “corrected” sensor values to the DQN model:

the real car in action

Conclusions:

  • invest in a good digital twin/simulator, add some noise to the simulator’s sensor values (weather conditions, lighting conditions, temperature variations etc.)
  • provide enough state to the model that it can realistically make a right decision
  • tune your reward function and your state rather than wasting too much time in hyperparameter tuning
  • early on test your models in real life to verify your simulation includes all relevant environmental parameters

Foundation of "IT-folks" association

Foundation of club/association IT-folks

Today, together with 4 other founding members, we founded the club/association IT-folks.

We want to foster the digital transformation in Germany by contributing to knowledge about IT topics in the general population.

More formally, this is the purpose of the association:

Purpose of association IT-folks

The purpose of the association is the promotion of popular and professional education, the promotion of science and research, and the promotion of civic engagement for the benefit of non-profit purposes in the field of computer and information sciences.

  1. The statutory purpose is achieved, for example, through the dissemination of appropriate knowledge and expertise through lectures, courses and maker projects.

  2. The association is not politically active; political statements of the members are not made in the name of the association.

  3. The offer of the association is basically directed to people of all age groups.

  4. The association is selflessly active; it does not primarily pursue its own economic purposes.

Website and github org

Our Website http://www.it-folks.de is still work in progress and not yet very helpful.

However here is our github org:

https://github.com/IT-folks

where you can for example see the presentation material and source code
of some Arduino classes we presented at VHS Tübingen.

Contact information

Our association is now formally registered in the “Deutsches Vereinsregister” as “IT-folks Tübingen e.V.” and you can reach us at

info[at]it-folks.de

Arduino classes

Preparing to present Arduino Classes at Volkshochschule Tübingen

Preparing Arduino classes

Joined a team of IT-folks to foster education about computer stuff.

In that context I will be an instructor at Volkshochschule Tübingen for two Arduino classes.

This will be for a german audience, so description is in German

221-55100 - Programmieren lernen mit Arduino - Schnupperkurs

https://www.vhs-tuebingen.de/kurssuche/kurs/Programmieren-lernen-mit-Arduino-Schnupperkurs/221-55100#inhalt

Wollten Sie schon immer mal programmieren lernen? Sind Sie interessiert an do-it-yourself Basteln?
Die Arduino Plattform ist die ideale Einstiegsplattform:
Innerhalb kurzer Zeit kann man IoT (Internet-of-things) Projekte wie Wetterstation, Beleuchtungssteuerung, Messen und Loggen von Strom, Wasser, einfache Robotikaufgaben etc. erlernen und selbst realisieren.

Voraussetzungen:

  • In diesem Schnupperkurs legen wir die Grundlagen.
  • Sie brauchen keine Vorkenntnisse - etwas Erfahrung in der Benutzung eines Computers als Endanwender ist aber von Vorteil.
  • Mindestalter 14 Jahre - darunter nur in Begleitung eines Erwachsenen

Für diesen Kurs wird keine Hardware benötigt - wir werden alle Programmieraufgaben in einem Simulator auf dem PC implementieren.

Wenn Sie in diesem Schnupperkurs Feuer gefangen habt, können Sie danach unsere weiteren Kurse besuchen, wo wir mit echter Hardware arbeiten und die Kenntnisse vertiefen.

221-55101 - Programmieren lernen mit Arduino Sensor Kit - Einstiegskurs

https://www.vhs-tuebingen.de/kurssuche/kurs/Programmieren-lernen-mit-Arduino-Sensor-Kit-Einstiegskurs/221-55101#inhalt

Wollten Sie schon immer mal programmieren lernen? Sind Sie interessiert an do-it-yourself Basteln?
Die Arduino Plattform ist die ideale Einstiegsplattform:
Innerhalb kurzer Zeit kann man IoT (Internet-of-things) Projekte wie Wetterstation, Beleuchtungssteuerung, Messen und Loggen von Strom, Wasser, einfache Robotikaufgaben etc. erlernen und selbst realisieren.

Voraussetzungen:

  • In diesem Schnupperkurs legen wir die Grundlagen.
  • Sie brauchen keine Vorkenntnisse - etwas Erfahrung in der Benutzung eines Computers als Endanwender ist aber von Vorteil.
  • Mindestalter 14 Jahre - darunter nur in Begleitung eines Erwachsenen
  • Wir bieten auch einen Schnupperkurs an, der vor diesem Kurs belegt werden kann.

Im Kurspreis ist eine Arduino Beginner Kit enthalten, welches aus einem Mikrokontroller und einigen Sensoren und Ausgabekomponenten besteht.
Sie erhalten dieses Kit nach Bezahlung der Kursgebühr beim ersten Kurstermin. Bei der Anmeldung entscheiden Sie sich bitte entweder für die empfohlene Original-Arduino (die teurere Variante) oder die preisgünstigere (Clone) Variante:

Arduino Sensor Kit Bundle - empfohlen - Preis ca. 40€ https://store.arduino.cc/products/arduino-sensor-kit-bundle
seeed studio Grove Beginner Kit - preisgünstige Variante - Preis ca. 24 € https://www.seeedstudio.com/grove-beginner-kit-edu

Inhalte:

  • Einführung in die Arduino Plattform
  • Was ist ein Computerprogramm?
  • Grundelemente von Programmen wie Variablen, Schleifen und Verzweigungen
  • Grundlagen und Grundelemente elektronischer Schaltungen
  • Ein- und Ausgabebausteine wie Sensoren, Displays, LEDs
  • einfache Arduino Programme (Arduino-Sprache ist eine Teilmenge von C++) unter Verwendung des Sensor-Kits
  • Eingehen auf Ihre Fragen

Safely deploy your own web server in your home network using a Cloudflare(TM) tunnel

Cloudflare tunnel

TL;DR: use cloudflare tunnel to deploy your web server at home

What I tried before

I have long tried to securely deploy my own web server in my home network which is hard to do right.
Just some examples of what can go wrong:

  • opening ingress ports in your router opens up all kinds of attack vectors to hackers
  • requires dyndns setup so that your domain can be found when IP address changes over night
  • requires let’s encrypt setup so that users of your web-site can use https

The following was required but is still needed with my new solution - but the attack vectors were drastically reduced

What I do now